Monday 03.11.2013 Evening
Car on stands
Drain diff
Tuesday 05.11.2013 Evening
Rear axles out
Bolt-on rear caliper adaptor brackets
Trial fit rotors and calipers
Wed 06.11.2013 Day
Purchase 2 x new rear axle housing seals
Purchase a new diff cover gasket
Purchase a replacement diff centre retaining pin
Purchase 10 x wheel studs
Purchase 10 x wheel nuts
Thu 07.11.2013 Day
Old studs removed
Purchase diff oil
Thu 07.11.2013 Evening
New studs pressed on axle
Remove rear disc hardware
File-finish axle housing flanges
Fit new axle seals
Refit rear disc hardware with new nuts
Refit axles with C-clips
Clean pin retainer and pin retainer cavity
Locate spider gears, insert pin
Fit pin retainer with Loctite
Fit hat with new gasket
Loose-fit calipers
Locate and measure rear brake line requirements
Fri 08.11.2013 Day
Purchase new rear brake lines
Sat 09.11.2013 Day
Fit rear brake lines
Fit new rear handbrake cables
Fit centre handbrake cable (retain existing front h/brake cable)
Fabricate new passenger side handbrake mounting hook (to suit short rear handbrake cables)
Remove driver side front drum
Dummy-up driver side front disc assembly
Thu 14.11.2013 Evening
Remove passenger side front drum
Relieve driver side mounting bracket to clear steering arm
Mon 18.11.2013 Evening
Bolt-up driver side front disc mounting brackets
Grease driver side front hub
Assemble driver side front hub and calliper/disc assembly
Relieve passenger side mounting bracket to clear steering arm
Bolt-up passenger side front disc mounting brackets
Grease passenger side front hub
Assemble passenger side front hub and calliper/disc assembly
Align and fit front brake hoses
Remove distribution block
Tue 19.11.2013 Evening
Remove existing master
Dummy-fit new master
Thu 21.11.2013 Evening
Remove existing booster
Enlarge holes in the firewall to fit new booster stud pattern
Sat 23.11.2013 Day
Dummy-fit new booster/master/combo valve
Make brake line templates
Monday 25.11.2013 Day
Purchase new front brake lines
Purchase 2 x blanking plugs
Monday 25.11.2013 Evening
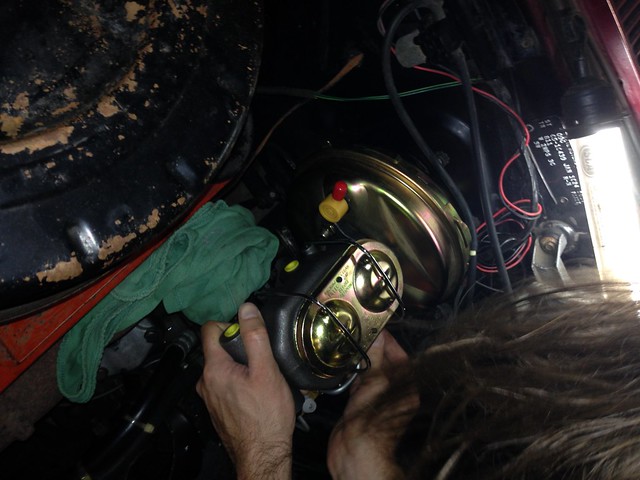
Bench bleed master
Bolt in the booster/master/combo valve
Bolt in new brake lines
Fill diff with oil
Thursday 28.11.2013 Evening
Grind down the booster-master pushrod
Bleed brakes
Drive!
To-Do
Tack-weld rear axle housing tabs
P-clips for rear hand brake cables
Adjust handbrake actuators?
Friday, 29 November 2013
Thursday, 28 November 2013
OK... *now* we're finished!
Shortened the booster-master push rod (thanks Rob S for the loan of the bench grinder... gotta' get me one of those!) by the thickness of the temporary spacers we had in.
Bleed brakes.
Bolt on the rear calipers (the calipers need to be cocked for bleeding to ensure the bleed nipples are horizontal and no air can get trapped in the caliper) and the brakes a final once over.
Wheels on and drop it back on the deck.
Connect vacuum hose to booster.
Start it up... time for the test drive!
Wow...!
Disc brakes have transformed the way the car drives and how you approach driving it. So much more confidence. You can stand on the brakes and it pulls up straight, with no early lock-up from the rears (which the drums were prone to do).
The kit went together like a dream and a HUGE thanks to JtC! Thanks for weaving your magic; easily the best mod we have made to the Chev yet.
Rego is coming up, so I will get Chris to tack the rear hose mounting tabs to the axle housing when it goes for pink slip.
Now to bed in the brakes and get some kms under the tyres.
J
Monday, 25 November 2013
Finished?
So with templates in hand, it was off to Brake Pro in the morning and a 15 min meeting to go through the requirements (I think they understood everything ;-)
Done and picked-up by lunchtime...
Miscellaneous saddles and 2 x blanking plugs for the existing distribution block...
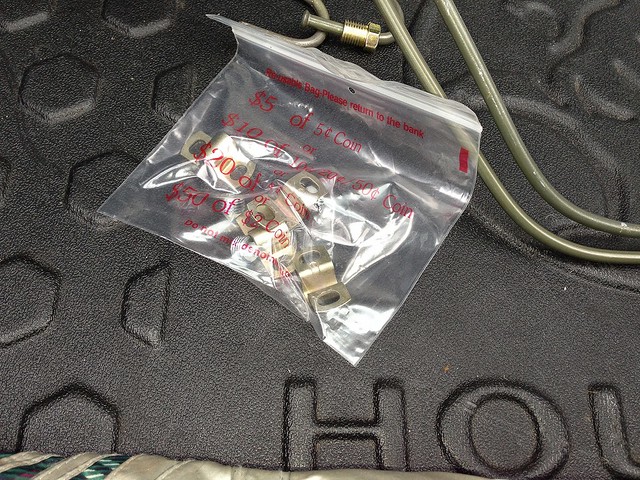
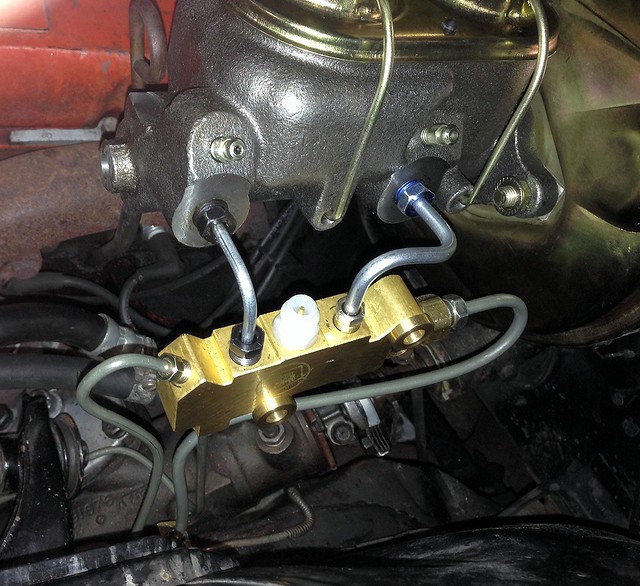
Fast forward to the evening. JtC came up and the new hard lines went in like a dream; it all looks pretty darn neat...
We retained the original distribution block for the existing front-to-rear line, then blanked off the old ports to the front brakes and fed the block from the rear master cylinder circuit.
While JtC was bolting up hard lines, I set to work pumping 2.5L of diff oil into the 12 bolt.
A once over the car to check all nuts were torqued up and it was time to bleed!
Though it soon became apparent that no fluid was coming out of the master front circuit...
After some choice words and head scratching for half an hour, it was time to hit technical assistance. We soon found this...
Right Stuff Detailing - Tech Centre - Trouble Getting Pressure To Brakes
Sounded like our problem - and answer 2 seemed the most likely culprit...
"The most common issue is the rod that comes out of the front of the brake booster and pushes the piston of the master cylinder. (NOT the booster rod that goes to the pedal, the opposite side.) This rod is often slightly too long and causes a pre load on the master cylinder. This pre load generally prevents fluid from flowing properly out of one of the master cylinder ports".
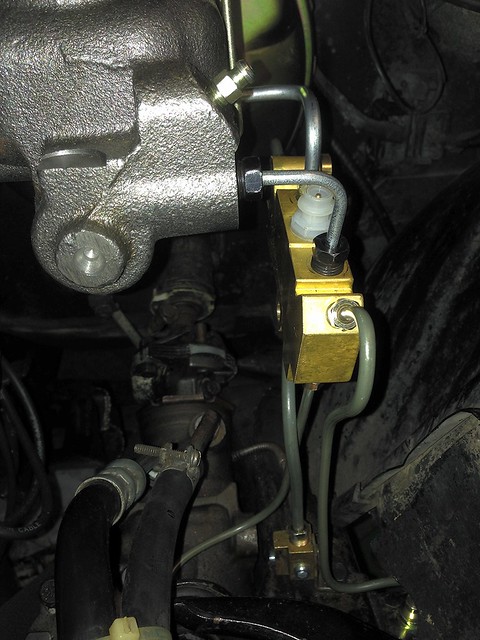
So we set to work and cracked the nuts holding the master to the booster. A couple of 3 mm thick spacers went in and the nuts re-torqued... success! Fluid exiting the master on the front circuit!
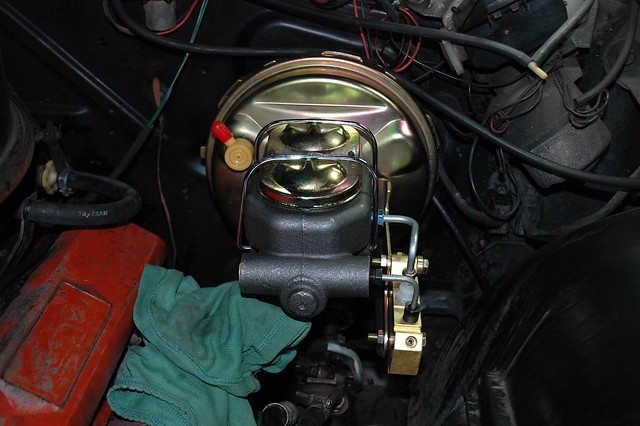
Note the master mounting nuts reversed and square spacers between the master and the booster...
We gave the brakes a bleed to see if we could get brakes - and we can - the Chev has operating disc brakes!
Technically we could throw the wheels on and go for a drive, but it was almost 23:00 so the decision was made to up-stumps for the night. Removing the temporary spacers and shortening the booster-to-master push rod would have to wait till next time.
Sooo close!
John out
Done and picked-up by lunchtime...
Miscellaneous saddles and 2 x blanking plugs for the existing distribution block...
Fast forward to the evening. JtC came up and the new hard lines went in like a dream; it all looks pretty darn neat...
We retained the original distribution block for the existing front-to-rear line, then blanked off the old ports to the front brakes and fed the block from the rear master cylinder circuit.
While JtC was bolting up hard lines, I set to work pumping 2.5L of diff oil into the 12 bolt.
A once over the car to check all nuts were torqued up and it was time to bleed!
Though it soon became apparent that no fluid was coming out of the master front circuit...
After some choice words and head scratching for half an hour, it was time to hit technical assistance. We soon found this...
Right Stuff Detailing - Tech Centre - Trouble Getting Pressure To Brakes
Sounded like our problem - and answer 2 seemed the most likely culprit...
"The most common issue is the rod that comes out of the front of the brake booster and pushes the piston of the master cylinder. (NOT the booster rod that goes to the pedal, the opposite side.) This rod is often slightly too long and causes a pre load on the master cylinder. This pre load generally prevents fluid from flowing properly out of one of the master cylinder ports".
So we set to work and cracked the nuts holding the master to the booster. A couple of 3 mm thick spacers went in and the nuts re-torqued... success! Fluid exiting the master on the front circuit!
Note the master mounting nuts reversed and square spacers between the master and the booster...
We gave the brakes a bleed to see if we could get brakes - and we can - the Chev has operating disc brakes!
Technically we could throw the wheels on and go for a drive, but it was almost 23:00 so the decision was made to up-stumps for the night. Removing the temporary spacers and shortening the booster-to-master push rod would have to wait till next time.
Sooo close!
John out
FW: Brake Lines
From: JtC
Sent: Monday, 25 November 2013 11:55 AM
To: John
Subject: RE: Brake Lines
OK this all sounds good – there will be no issue with us using 3/16” line for that rear circuit supply line from the dist block-to-dist block. Your old master was a single circuit: that one ¼” line supplied both front and rear circuits via the dist block.
I was more wondering if he would be able to provide the larger fittings we require on the smaller line though, but it sounds like he has that under control. Line diameter shouldn’t matter as far as I can make out.
Yes, get some of those small brake line saddles… any you don’t use will be happily used on my EK!
Oh and I don’t know about brake fluid any more – been a while for me. Have a look at what The Right Stuff recommend for the installation, or ask your man at BrakePro. Get it from them on your way home tonight.
Shall I head up after work then?
JtC
From: John
Sent: Monday, 25 November 2013 11:47 AM
To: JtC
Subject: Brake Lines
OK… so stopped-off this morning to drop the jig saw puzzle into Brake Pro. Spent a good 15-20 mins briefing them.
They were fine with it all. The fabricator mentioned that everything these days is made out of 3/16” line and that ¼” line is obsolete, though he saw that I had a new ¼” line ) the one with the blue/gold fittings) so he said he will see what I can do.
He has ¼” line, he was just unsure that he had the 7/16” and 9/16” fittings to suit that diameter.
Blanking plugs were no prob, they take an allen key. Retaining hardware, they simply had small saddles to take 3/16’ line. They didn’t have any separators.
I will take a wander through the workshop here and see what I can find.
Must remember to get brake fluid, we’ll need quite a bit. DOT4?
J
Saturday, 23 November 2013
Arts and Crafts
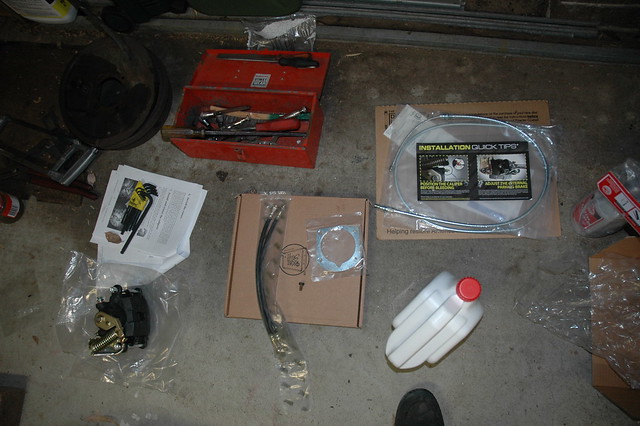
Saturday was another working bee; the goals being:
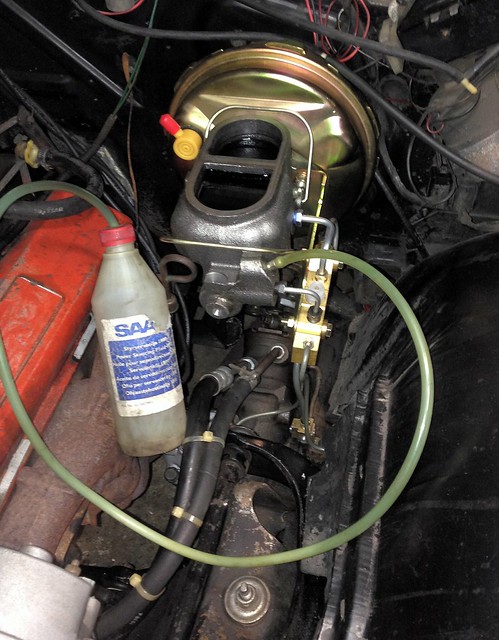
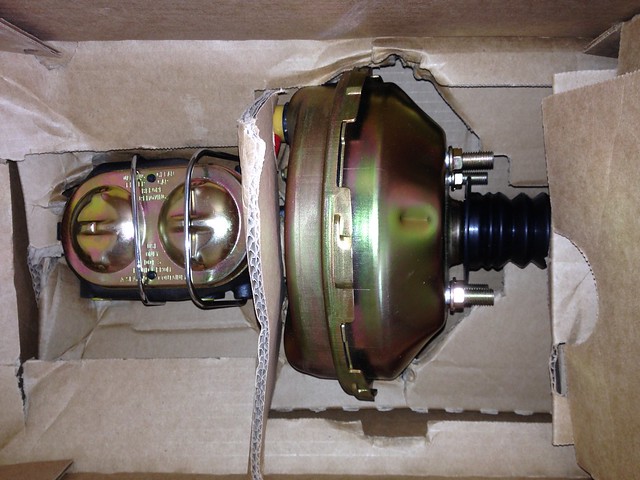
Organised chaos...
Booster/Master/Combination Valve assembly in place...
We salvaged old brake line that was lying around to bend into shape and use as templates...
Detailed instructions...
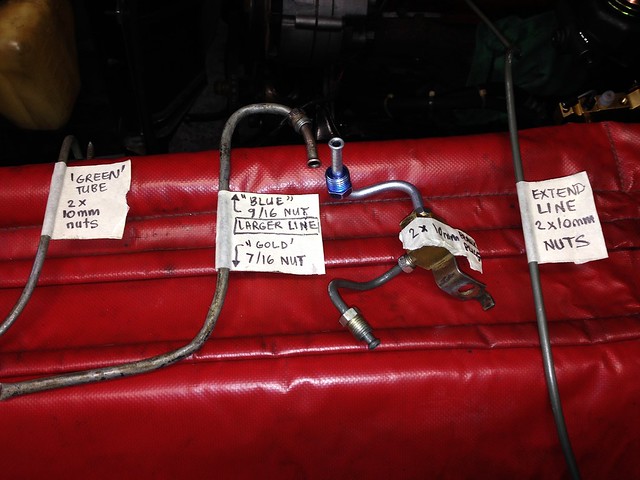
(and by 10 mm we mean 3/8").
Done! Next stop, the brake shop.
John out
- bolt up the master
- connect the brake pedal and - perhaps most importantly -
- form some templates for new hard lines, ready to take to Brake Pro on Mon for them to make up.
Organised chaos...
Booster/Master/Combination Valve assembly in place...
We salvaged old brake line that was lying around to bend into shape and use as templates...
Detailed instructions...
(and by 10 mm we mean 3/8").
Done! Next stop, the brake shop.
John out
Thursday, 21 November 2013
Booster + Master
Old booster and master off. Cleaned up nicely...

New brackets from the two kits... different!
Ones on right are from replacement kit, ones on left are damaged booster kit...

Ooo... instructions say "Bolt booster to four studs on firewall"...
...but there ain't no studs!
Ok, so we buy bolts... but the bolt pattern of the brackets is different!
Maybe centres are diff for manual brake car?
Plan B: slot lower holes with a rat's tail file to fit 87 mm centres and voila!

Bed time.
J
Booster Bolt Centres
Old
Across base 95 mm
Across top 87 mm
Verticals 87 mm
New
Across base 87 mm
Across top 87 mm
Verticals 87 mm
J
Across base 95 mm
Across top 87 mm
Verticals 87 mm
New
Across base 87 mm
Across top 87 mm
Verticals 87 mm
J
Tuesday, 19 November 2013
Starting under the bonnet
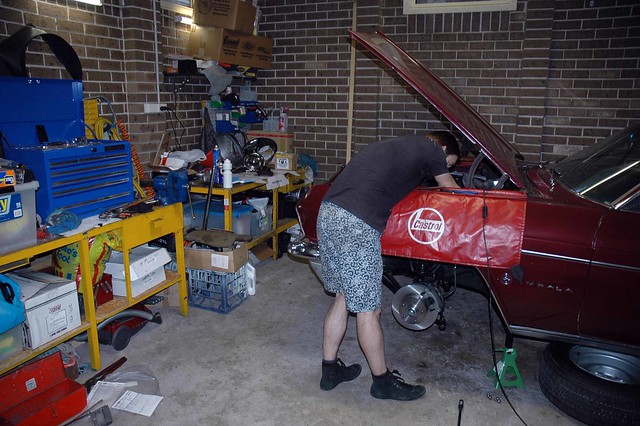
Moved the Chev over and the Honda is back in. Gave the garage a good clean too.
P.S. Discovered something interesting about tyre overall diameters and clearances to the guard ;-)
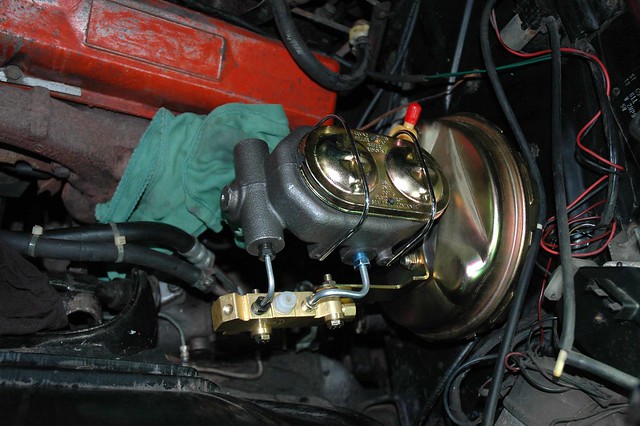
The simplest new-to-old interface...

...new master bolted-up to old booster.
JtC:
What about the 15° angle business?
J:
Yeah, not sure how vital that is as it also says if booster bolt pattern matches firewall, then you can bolt it straight up without brackets. It is the brackets that give the 15 deg.
JtC:
Have you tried bolting up the new booster? Why wouldn't you try that?
J:
I measured bolt spacing first and they no match. The next test is to try the kit's bracket bolt spacing. They look slotted, so can cope with some variation.
John out
P.S. Discovered something interesting about tyre overall diameters and clearances to the guard ;-)
The simplest new-to-old interface...

...new master bolted-up to old booster.
JtC:
What about the 15° angle business?
J:
Yeah, not sure how vital that is as it also says if booster bolt pattern matches firewall, then you can bolt it straight up without brackets. It is the brackets that give the 15 deg.
JtC:
Have you tried bolting up the new booster? Why wouldn't you try that?
J:
I measured bolt spacing first and they no match. The next test is to try the kit's bracket bolt spacing. They look slotted, so can cope with some variation.
John out
Monday, 18 November 2013
Discs on and back on the deck
Firstly, the booster that came with the kit was damaged in transit. Summit kindly sent out a replacement and this was waiting for me on my desk this morning...
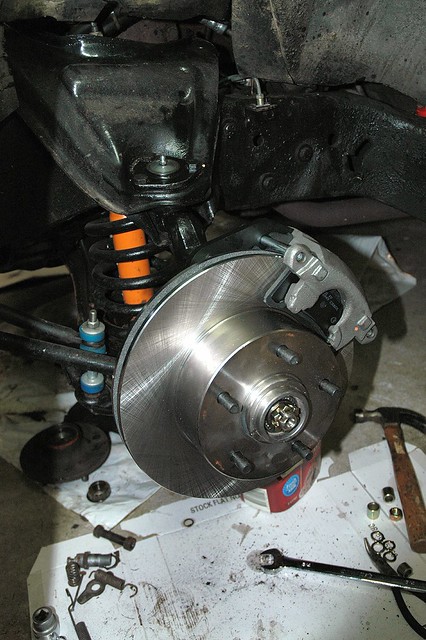
The evening brought JtC North; time to finish the installation of the rotors.
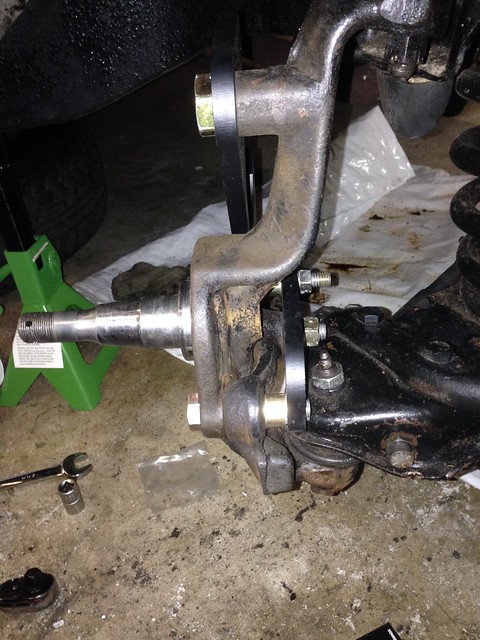
Passenger side brackets torqued up...

Some detail shots of the bracket arrangement...

Bearings were packed with grease and installed in the hubs. Calipers were bolted up and time was spent routing the front brake hoses so they didn't rub on the chassis rails.
Before long, the wheels were back on and the Chev was back on the ground again...
The end is in sight with the booster/master left to do, along with the front brake lines.
J
The evening brought JtC North; time to finish the installation of the rotors.
Passenger side brackets torqued up...
Some detail shots of the bracket arrangement...
Bearings were packed with grease and installed in the hubs. Calipers were bolted up and time was spent routing the front brake hoses so they didn't rub on the chassis rails.
Before long, the wheels were back on and the Chev was back on the ground again...
The end is in sight with the booster/master left to do, along with the front brake lines.
J
Thursday, 14 November 2013
Some adjustments
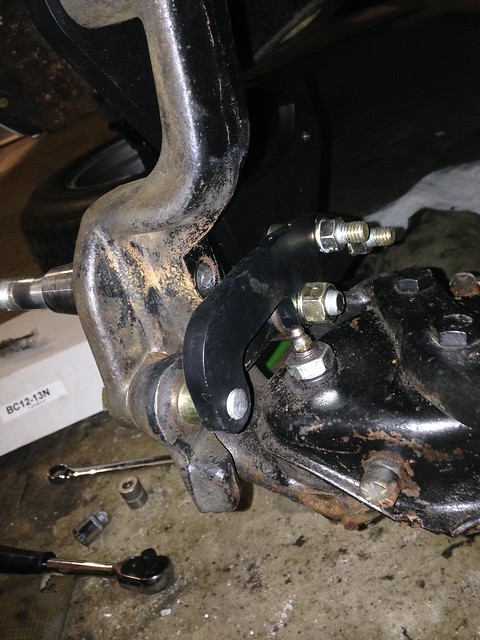
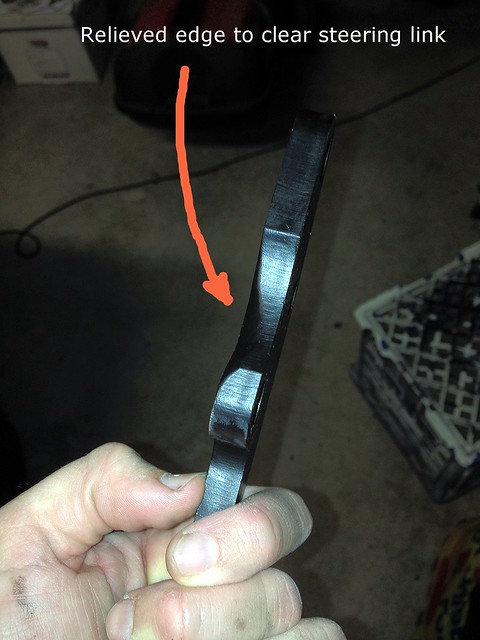
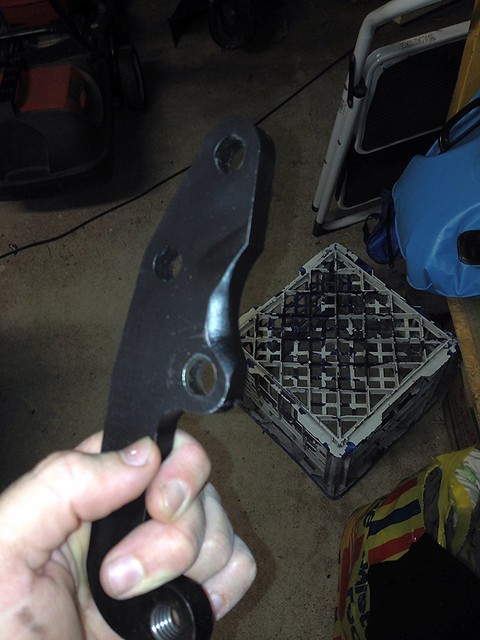
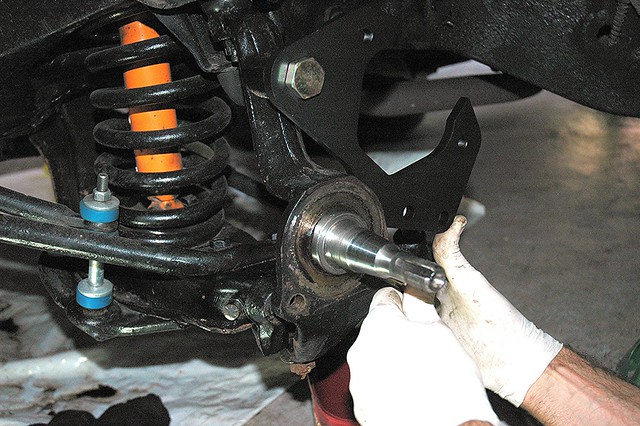
With the lower bracket ever so slightly fouling on the steering arm, it was time to get modifying with a hand file.
Once relieved, the bracket was given a hit of satin black.
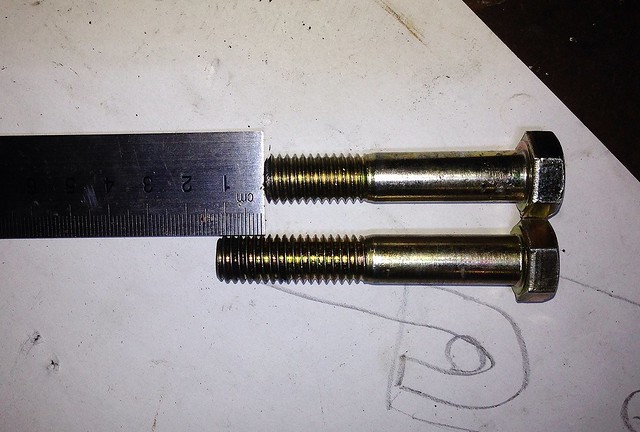
The forward mounting bolt also needed to be shortened ~ 0.5" as it fouled the lower control arm before the bump stop at full lock...
Done!
J
Once relieved, the bracket was given a hit of satin black.
The forward mounting bolt also needed to be shortened ~ 0.5" as it fouled the lower control arm before the bump stop at full lock...
Done!
J
Saturday, 9 November 2013
Finishing the rears and onto the front
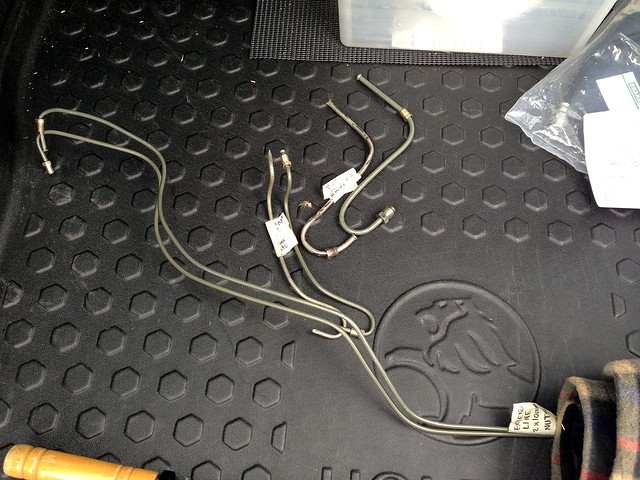
New rear brake lines made-up. Photo showing new vs. old...

Let's get them in!
Sweet as a nut!
Handbrake was then hooked up. The supplied centre cable was the wrong part (too short), so we reused the existing one. Both rear handbrake cables finish slightly further toward the rear of the car than the originals, so we had to make-up a passenger side handbrake mounting hook extension to get it all to fit.
To the front of the car now. The drums came off easily enough and it was time to dummy-up the kit's brackets...
The bottom bracket picks up the steering arm connection bolts and the brackets as-supplied both need a bit of relieving to clear the steering arm. That will be a job for next time.
J
Thursday, 7 November 2013
Rear Discs (cont.)
Bits and pieces acquired and old studs belted out of the flanges; time to fit it together...

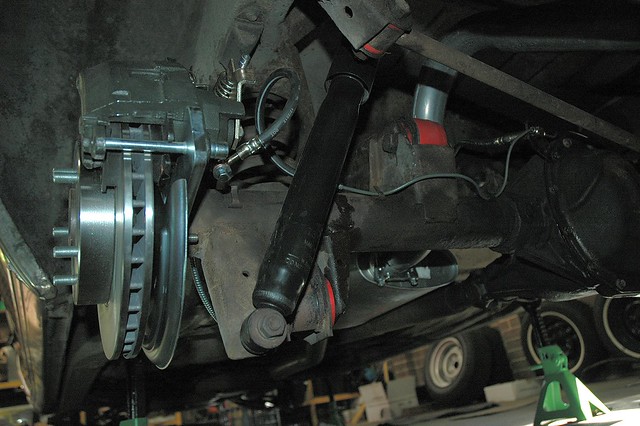
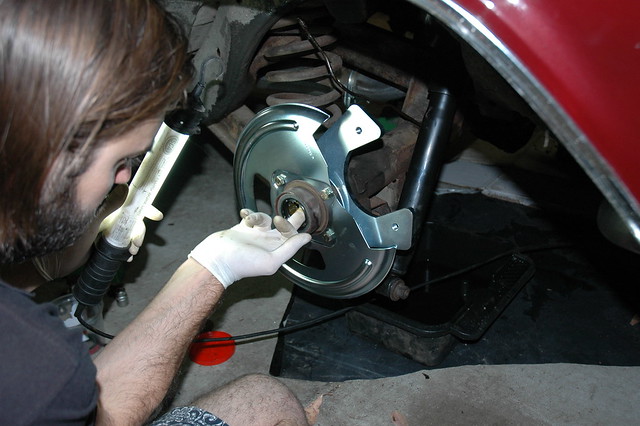
Greasing the axle housing seals...
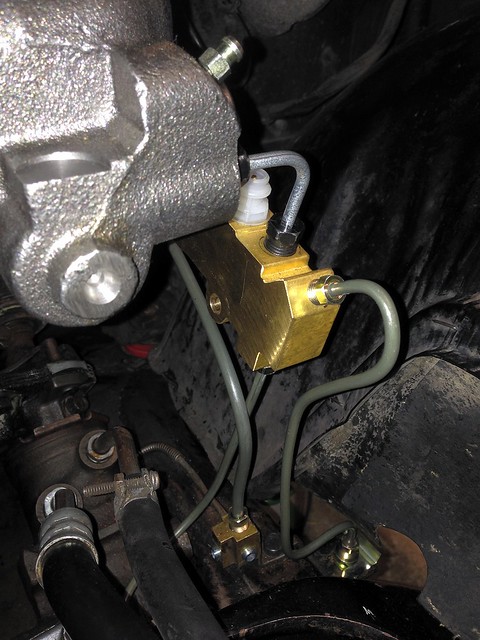
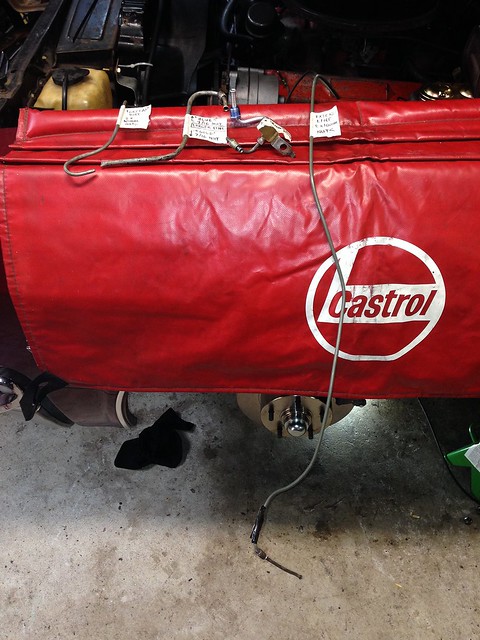
A couple of reference shots, showing the route of the existing hard lines...
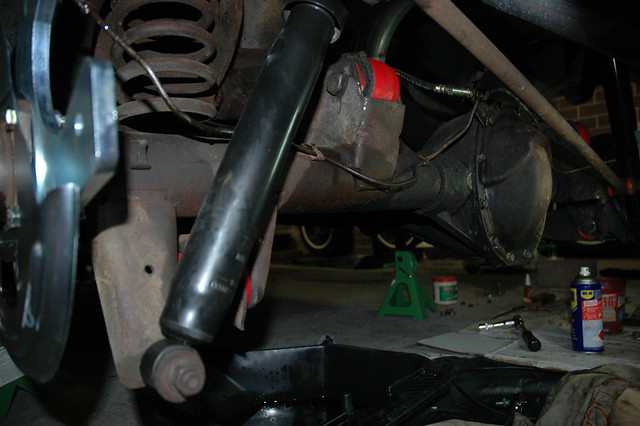
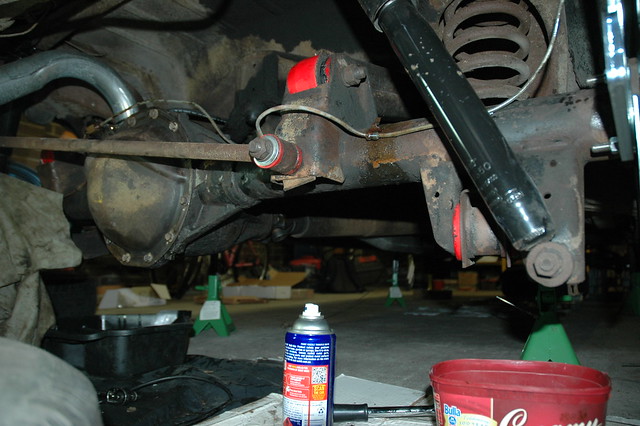
Finally, mocking-up the route of the flexible hose and the brake line/brake hose mounting tab...
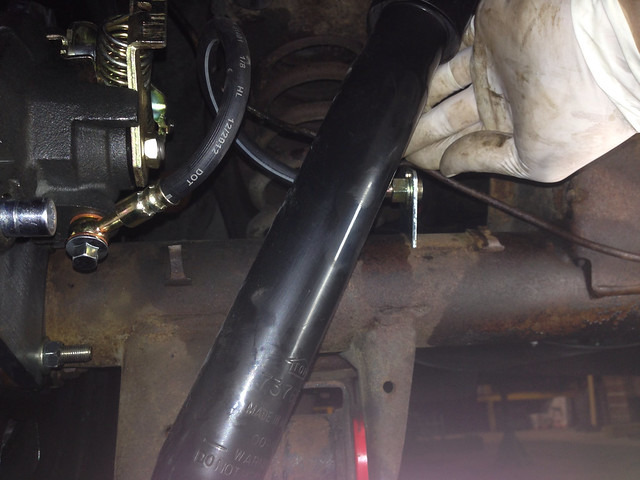
You can see from the photo above that each hard line needed to be shortened, so time for some new lines to be made-up.
J
Greasing the axle housing seals...
A couple of reference shots, showing the route of the existing hard lines...
Finally, mocking-up the route of the flexible hose and the brake line/brake hose mounting tab...
You can see from the photo above that each hard line needed to be shortened, so time for some new lines to be made-up.
J
FW: Studs


Sent: Thursday, 7 November 2013 12:09 PM
To: JtC
Subject: RE: Studs
See attached!
Went to local mechanic this morning.
Mech: Want to know what we do?
John: Belt each with a hammer?
Mech: Yep, back the car into the w/shop and we'll give it a hit
3 mins and job is done. A few took two hits with a mini sledge, One took several hits and the rest were one-hitters.
Mech: want to know how we press the new ones in?
John: reverse the acorn nuts and do them up?
Mech: yep!
The plan is to get this at lunch (i.e. in two minutes I'll head out)...
http://www.supercheapauto.com.au/online-store/products/Castrol-Multitrax-Transaxle-Manual-Transmission-Fluid-4-Litre.aspx?pid=1276#Cross
Good call re. delivery method... had forgotten about that one!
J
-----Original Message-----
From: JtC
Sent: Thursday, 7 November 2013 11:45 AM
To: John
Subject: RE: Studs
Morning (just),
How's progress? I am all set to head up again tonight. Let me know that you have all the parts and axles etc.
Don't forget to look into diff oil to suit your (single spinner) diff and a delivery method. Though we won't have to fill it tonight of course.
JtC
Tuesday, 5 November 2013
Rear Discs
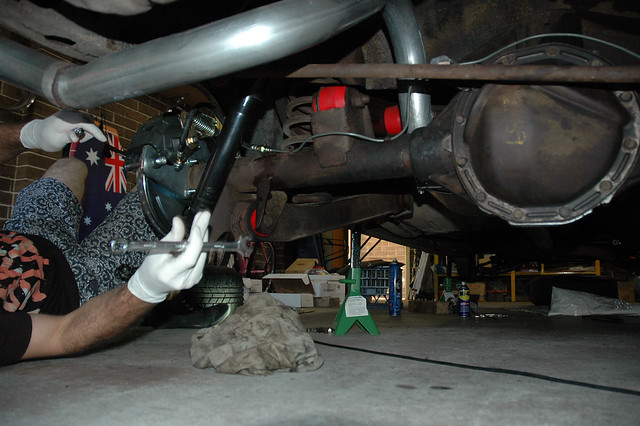
Tue night sees JtC make the trip to Chev Central.
Relatively short work is made of removing the rear axles, except we found the small retaining pin was snapped-off and when unscrewed, only ~ 20% came out, the rest was left in the hole! Thankfully, JtC was able to coax the remainder out with a scribe... definitely dodged a bullet there!
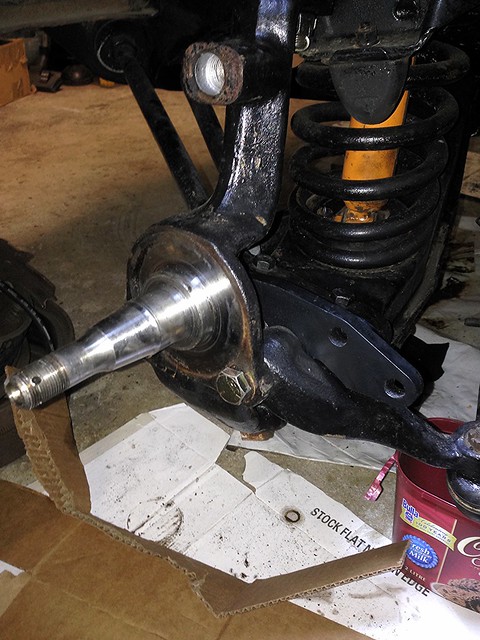
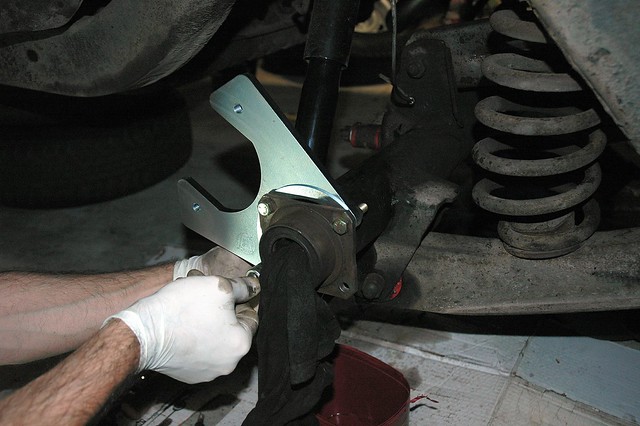
Cleaning up the axle flanges...
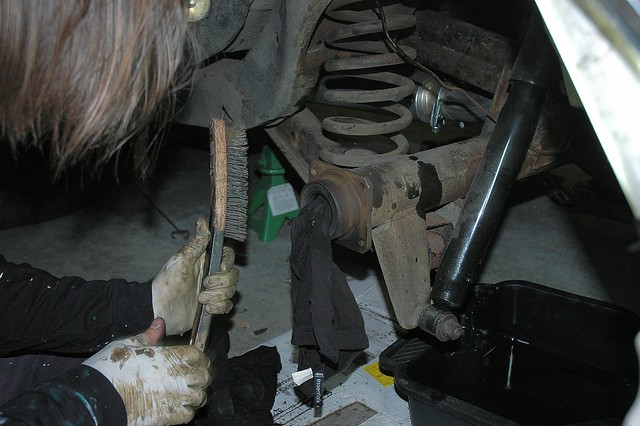
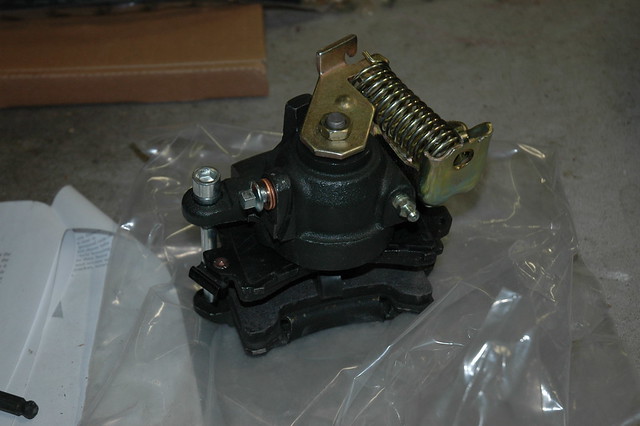
Sweet new part goodness! The quality of construction and finish of the parts from Right Stuff is good...
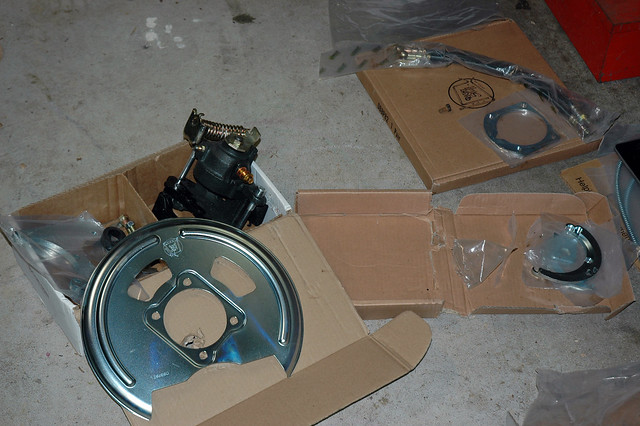
Then dummying it up...
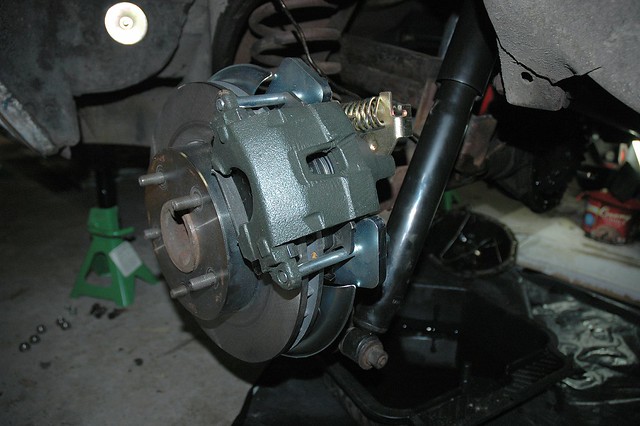
The caliper needs to be trial fitted to check what spacer is required to centre the caliper on the disc. Mine took the thinnest of the three spacers (the 0.25" spacer)...
Lookin' good so far...
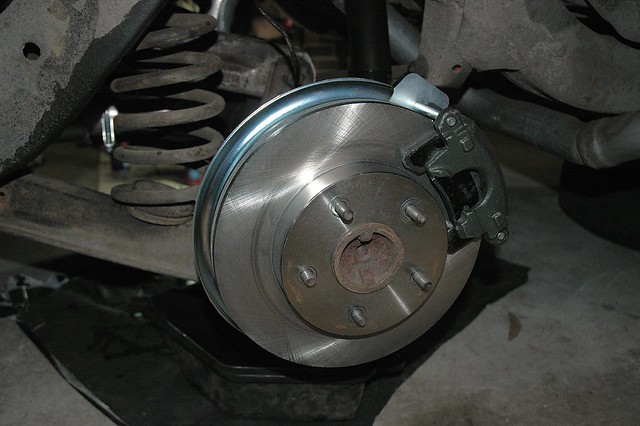
The rotor hat is thicker than the drum backing plate, so I will need to replace some of the shorter wheel studs for longer ones; the decision was made to replace the lot.
A bit of a shopping list then:
- 2 x new rear axle housing seals
- a new diff cover gasket
- a replacement diff centre retaining pin
- 10 x wheel studs
- 10 x wheel nuts
John out
Relatively short work is made of removing the rear axles, except we found the small retaining pin was snapped-off and when unscrewed, only ~ 20% came out, the rest was left in the hole! Thankfully, JtC was able to coax the remainder out with a scribe... definitely dodged a bullet there!
Cleaning up the axle flanges...
Sweet new part goodness! The quality of construction and finish of the parts from Right Stuff is good...
Then dummying it up...
The caliper needs to be trial fitted to check what spacer is required to centre the caliper on the disc. Mine took the thinnest of the three spacers (the 0.25" spacer)...
Lookin' good so far...
The rotor hat is thicker than the drum backing plate, so I will need to replace some of the shorter wheel studs for longer ones; the decision was made to replace the lot.
A bit of a shopping list then:
- 2 x new rear axle housing seals
- a new diff cover gasket
- a replacement diff centre retaining pin
- 10 x wheel studs
- 10 x wheel nuts
John out
Monday, 4 November 2013
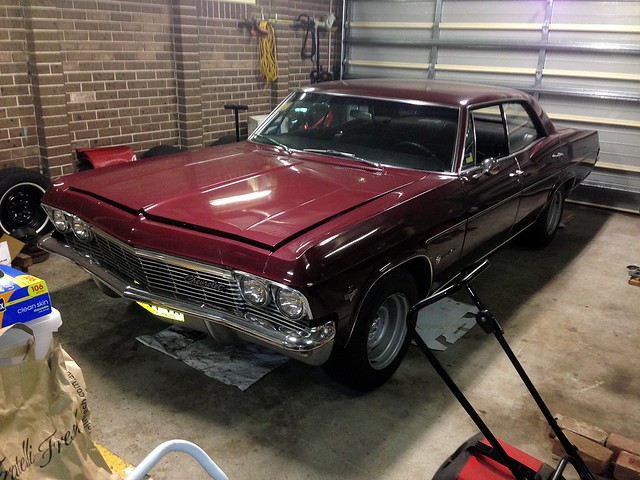
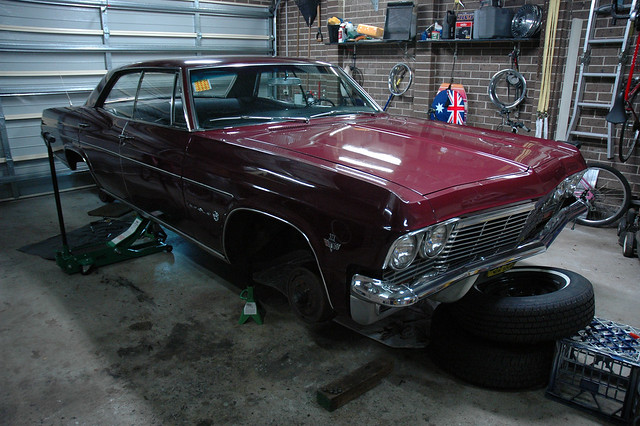
So it begins...
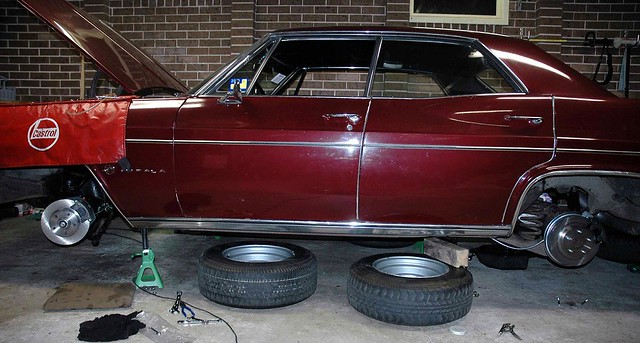
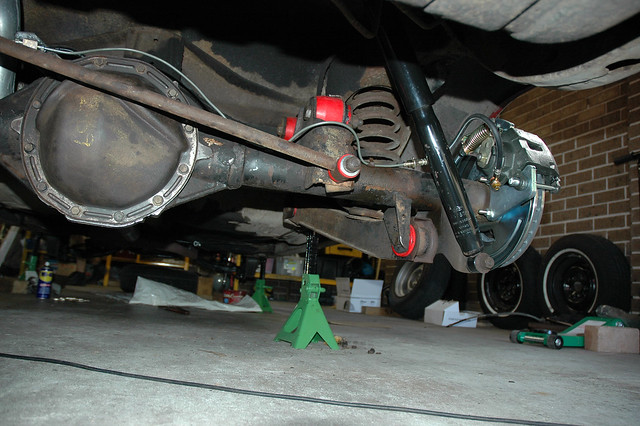
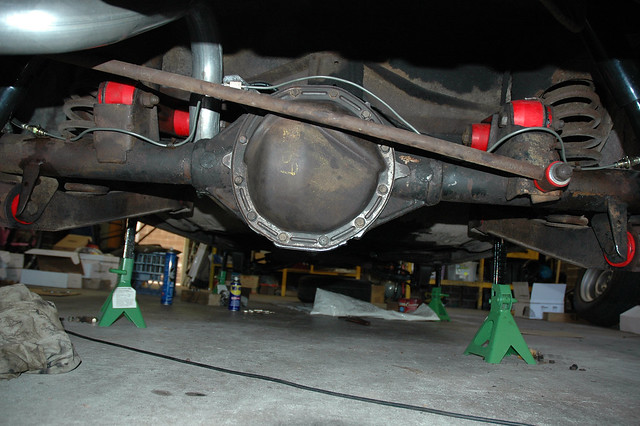
To give space for the rear axles to come out, the Chev will live in the centre of the double garage, relegating the Honda to the driveway and the elements.
Drain the diff and remove the cover...
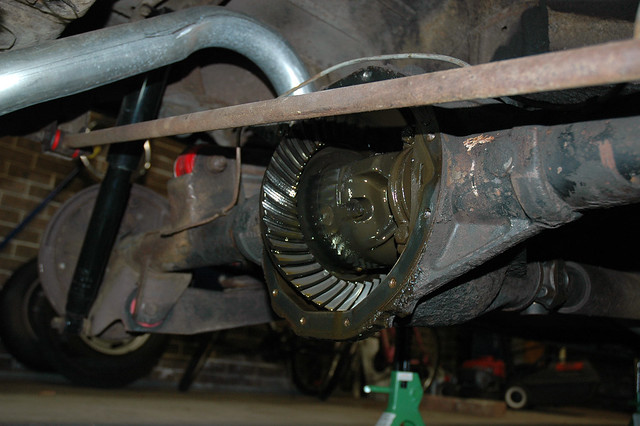
The large pin that 2 x spider gears run on is located and restrained by a small pin. It is this small pin that must first be unscrewed, then the large pin pushes out to allow the axles to be pushed toward the centre of the car and the retaining C-clips removed to allow removal of the rear axles.
Simple!
J
Drain the diff and remove the cover...
The large pin that 2 x spider gears run on is located and restrained by a small pin. It is this small pin that must first be unscrewed, then the large pin pushes out to allow the axles to be pushed toward the centre of the car and the retaining C-clips removed to allow removal of the rear axles.
Simple!
J
Subscribe to:
Posts (Atom)