JtC came up to check for himself the exhaust leak and my efforts with the shroud/fan.
Puttied-up exhaust leaks where the pipe enters the muffler and between the face of the muffler and the body. Holds, but seems temporary.
Fuel leak at carby wasn't fuel inlet as suspected, but it was a 0.25" welsh plug right next to the inlet that was leaking. A few taps with a punch looks to have sealed the leak.
Ooo... and the previously purchased Impala badges are on! (After a lot of cursing and squeezing an arm between the inner guard and the guard).
Finished with a clean.
Thanks Joe!
sent from my Telstra NEXTG™ handset
Saturday, 28 April 2012
Thursday, 26 April 2012
Exhaust Leak
From: John
Sent: Thursday, 26 April 2012 2:04 PM
To: Joe "The" Driver
Subject: Exhaust Leak
Hi there,
Been clocking up the miles on the Chev; went out to the beaches yesterday and to work today.
Near the driver’s door, you can hear a flutter from the exhaust. At lunch just now, I checked with a mate and blocking the tail pipe makes it louder.
The front of the muffler has slightly separated from the barrel of the muffler creating holes.
New exhaust time; or at least a weld patch-it job.
J
Wednesday, 25 April 2012
Thursday, 19 April 2012
Melting and Moulding
Rather than trim down the fan fins, we decided to try heating the shroud to soften it and mould it to give a bit more clearance to the fan.
I had a Holden Commodore 6-cylinder shroud lying around, so it became the test mule to see what was/wasn't achievable. The shroud was clamped to the workbench and the kids' mini skateboard used as a moulding tool.
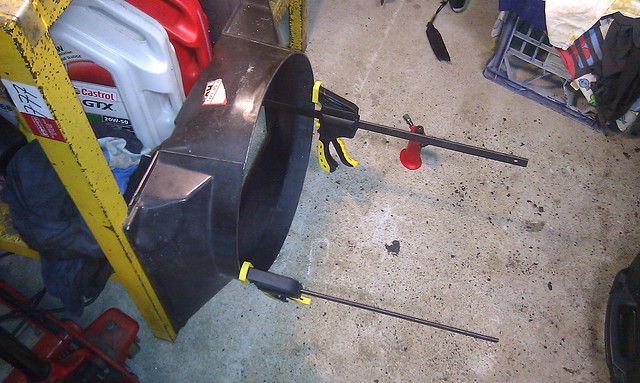
A butane torch was the heat source and - after a bit of trial and error - I got a bit of a technique down on how to heat and mould the plastic.
The test also showed it was easier to clamp the skateboard to the workbench and bring the shroud to the modifying wheel like so...
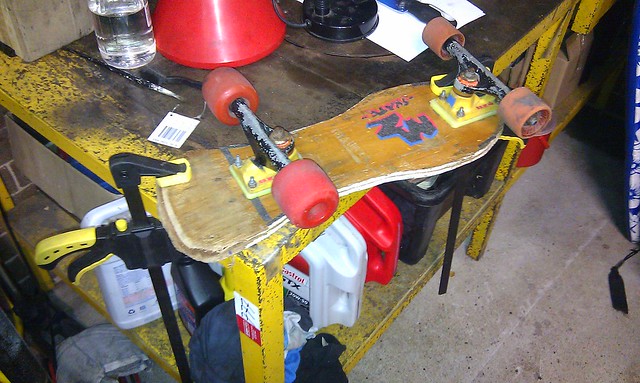
If I was to do it again, I would have had a 2nd person heat while I worked the shroud over the skateboard wheel as it was hard to heat, then quickly work the softened plastic.
But, I got there!
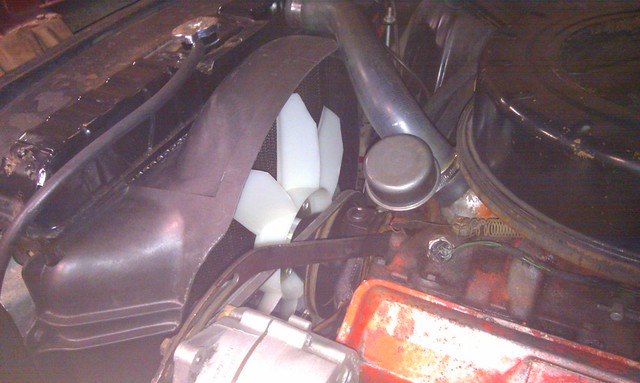
The fan sits low in the shroud, so there is a larger gap a the top than the base, but it should be an improvement over no shroud at all.
I had a Holden Commodore 6-cylinder shroud lying around, so it became the test mule to see what was/wasn't achievable. The shroud was clamped to the workbench and the kids' mini skateboard used as a moulding tool.
A butane torch was the heat source and - after a bit of trial and error - I got a bit of a technique down on how to heat and mould the plastic.
The test also showed it was easier to clamp the skateboard to the workbench and bring the shroud to the modifying wheel like so...
If I was to do it again, I would have had a 2nd person heat while I worked the shroud over the skateboard wheel as it was hard to heat, then quickly work the softened plastic.
But, I got there!
The fan sits low in the shroud, so there is a larger gap a the top than the base, but it should be an improvement over no shroud at all.
Thursday, 12 April 2012
Fine-tuning the Fan Fitting
With the shroud mounted-up, it was time to fit the fan.
It was decided to use the universal fan I got with the shroud.
Without a spacer, it fouled some of the ancillaries. A measure showed around 0.75" placed the centre of the fins along the entrance to the shroud.
As the water pump can accommodate two different fan mounting PCD's and the universal fan is slotted to also take a variety of bolt patterns, I tried a 1" spacer for a Holden Red Motor.
Of course, I completely forgot about the water pump pulley and it DOESN'T suit the Red Motor water pump bolt pattern <slap forehead>. 1" also looked like it was going to push the fan too far into the shroud and foul on the tapered section.
Back to Rare Spares.
Plan B was to try an aftermarket, universal 0.5" spacer.
Bingo!
Once it was all bolted together, the fins of the fan juuust skimmed the shroud. Time for some modification... another day.
Wednesday, 4 April 2012
Fab it up
During the day, I salvaged a piece of 2 mm gal sheet.
JtC came up in the evening to see what we could conjure up in the way of bracketry. Thank goodness he brought a decent hacksaw!
Bending begins...
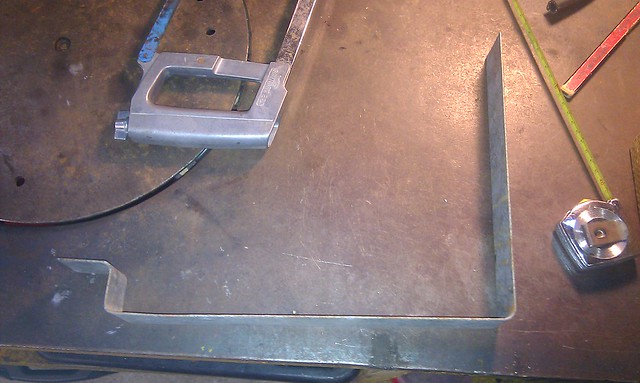
After bending...
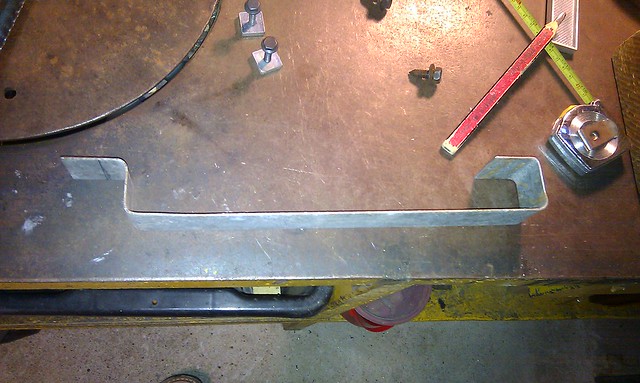
After a series of trial fits and trims with the angle grinder, we ended up with this...

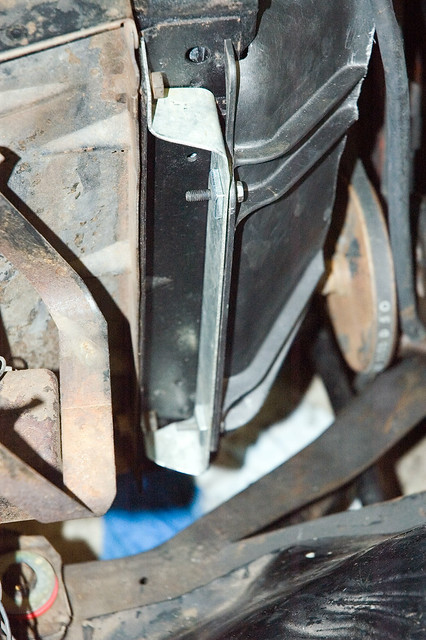
Bewdiful!
Driver's side was enough for one night. I finished off the passenger side on 6/4.
JtC came up in the evening to see what we could conjure up in the way of bracketry. Thank goodness he brought a decent hacksaw!
Bending begins...
After bending...
After a series of trial fits and trims with the angle grinder, we ended up with this...
Bewdiful!
Driver's side was enough for one night. I finished off the passenger side on 6/4.
Monday, 2 April 2012
Shroud Mount Bracket Design
With the shroud modified and made to fit, it was time to attach the sucker. Design time...
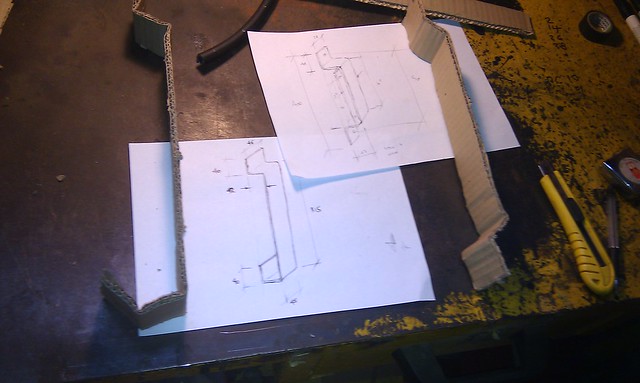
Final Sketch...

May the fabrication commence!
Final Sketch...

May the fabrication commence!
Subscribe to:
Posts (Atom)