Oil change (Castrol GTX 20W-50)
Oil filter change (Ryco R2124P)
Top-up auto trans
Top-up power steering
Check spark plugs
New points
Set ignition timing + idle mixture + idle speed
Bleed brakes
Last Oil + filter change = 56,936.8 "miles"
This Oil + filter change = 59,554.7 "miles"
Diff = 2,617.9 x 2.12 (conversion factor) = 5,550 km
Plugs were sooty, but noticed soot on the last half of the threads. Time for a bit of research...
How To Decode Spark Plug Part Numbers - NGK
Original Plugs: NGK BP5S
Plugs Dec 11: NGK B5ES
The original plugs have the the standard 9.5 mm (3/8") thread reach where the 2011 plugs have a 19 mm (3/4") reach.
The original plugs have a projected insulator design where the 2011 plugs don't.
From what I can gather, 1965 Chev small block heads require 0.375" reach (i.e. 3/8") = original plugs!
Thankfully I had soaked the originals in thinners after they were removed in 2011, so were pretty clean; after gapping to 0.035" they were once more put back into service.
The points were pretty badly pitted evenly across the contact faces. New points installed and the dwell set to bang-on 30 deg.
J
Showing posts with label idle mixture. Show all posts
Showing posts with label idle mixture. Show all posts
Monday, 27 January 2014

Friday, 7 October 2011
Electrics #1
JtC is back! And I had the day off as annual leave, so it was a perfect day to Chev.
With the Chev on stands, it would make an awful noise if dropped into drive. JtC suggested it was tailshaft brushing the exhaust with the rear axle and gosh darn wasn't he 100% right... phew! I had images running through my head of some exy repair.
Next, idle mixture adjustment...
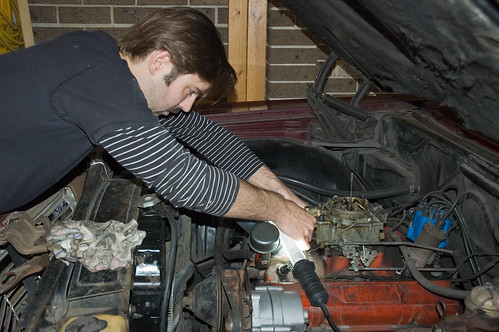
Both idle mixture needles were 1.5 turns out of the seated position, so Joe set them both to 2 turn out to give a slightly higher idle speed.
Then it was electrical time. First project, LHF indicator.
The test lamp showed no power at the bulb, so we traced the prob back to (most likely) the indicator switch... and that meant steering wheel removal.
Banging and pulling with hands didn't do anything so we had fabricate our own Driver-patented* steering wheel puller...
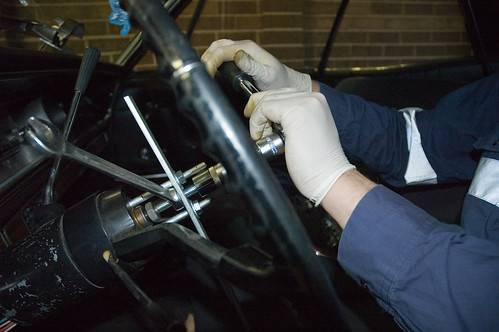
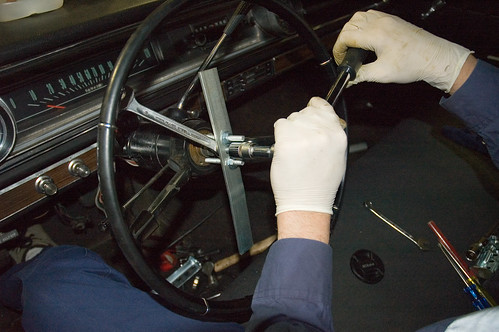
A few twists of the socket and voila! Steering wheel off.
Digging into the bowels of the steering column soon revealed the indicator switch where we discovered a weird arrangement where a plastic spigot would push a strip of metal onto another to make contact... ok, so not so weird. The weird part was the strip would make contact and complete the rear indicator circuit first, then continue its travel and make further contact to complete the front indicator circuit. Weird.
It was at this point we found the strip could not quite travel enough to make the second contact (i.e. active the front indicator circuit) on the LH side.
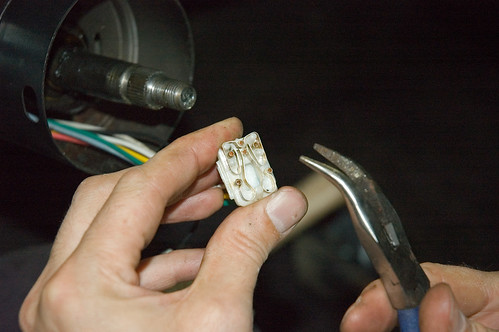
A quick adjustment with needle nose pliers...
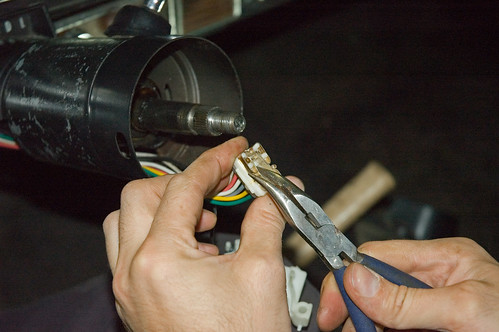
...and double voila! We had the LHF indicator!
We noticed the outer component of the indicator switch had a crack through it, so time to source a new one and replace it before we return the steering wheel to its rightful home.
*may or may not be patented.
With the Chev on stands, it would make an awful noise if dropped into drive. JtC suggested it was tailshaft brushing the exhaust with the rear axle and gosh darn wasn't he 100% right... phew! I had images running through my head of some exy repair.
Next, idle mixture adjustment...
Both idle mixture needles were 1.5 turns out of the seated position, so Joe set them both to 2 turn out to give a slightly higher idle speed.
Then it was electrical time. First project, LHF indicator.
The test lamp showed no power at the bulb, so we traced the prob back to (most likely) the indicator switch... and that meant steering wheel removal.
Banging and pulling with hands didn't do anything so we had fabricate our own Driver-patented* steering wheel puller...
A few twists of the socket and voila! Steering wheel off.
Digging into the bowels of the steering column soon revealed the indicator switch where we discovered a weird arrangement where a plastic spigot would push a strip of metal onto another to make contact... ok, so not so weird. The weird part was the strip would make contact and complete the rear indicator circuit first, then continue its travel and make further contact to complete the front indicator circuit. Weird.
It was at this point we found the strip could not quite travel enough to make the second contact (i.e. active the front indicator circuit) on the LH side.
A quick adjustment with needle nose pliers...
...and double voila! We had the LHF indicator!
We noticed the outer component of the indicator switch had a crack through it, so time to source a new one and replace it before we return the steering wheel to its rightful home.
*may or may not be patented.
Subscribe to:
Posts (Atom)