Wednesday 31 August 2011

More Progress

fuel hose done

battery clamp done

New Battery Clamp

cnt exhaust hanger done

end exhaust hanger done

Phew!

Monday 22 August 2011

Carburettor

Carby02

Tab markings...

7025121
| J4 | 0|9

Carby03

Which means...

Rochester 4-GC
4-barrel carb
1965 Chev Impala V8 327ci
Auto transmission (w/o air con)

Sunday 21 August 2011

On the Ground & Mobile!

Today saw the Impala return to mother earth again, on all four paws, for the first time in around three months!

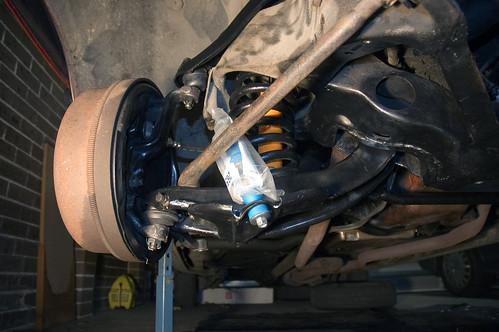
We used the old sway bar D-shackle bushes until we replace the incorrect ones.

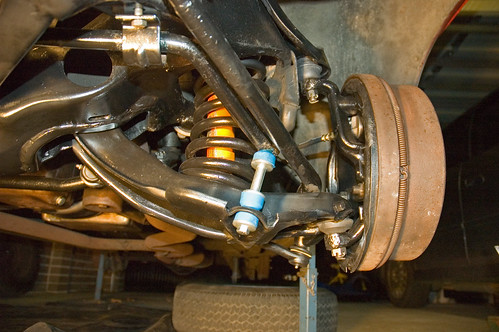
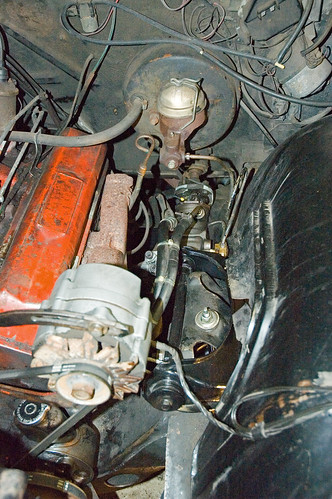
With the wheels on bricks, we could access the suspension to nip up all the bush nuts and grease the ball joints.

Bouncing the suspension showed everything to be silky smooth. Steering was stiff at first turn, but quickly smoothed out as we grease did its thing.

Next was a quick wheel alignment. The steering wheel and wheels looked to be pointing pretty much where we wanted straight out of the box.

A block of wood against the rim, held up against a vertical spirit level helped set the camber ever so slightly negative.

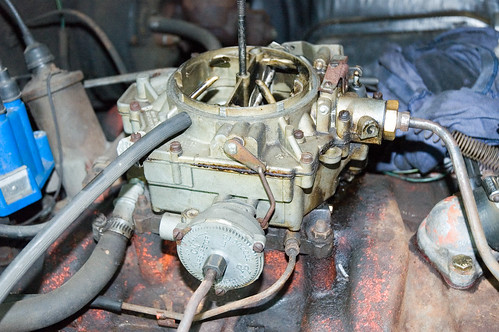
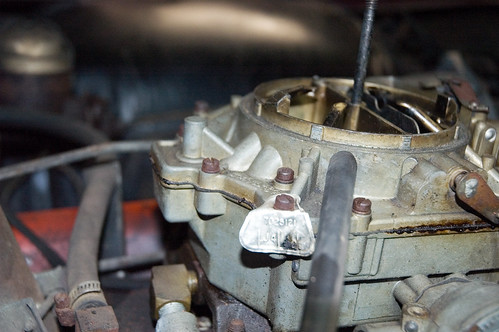
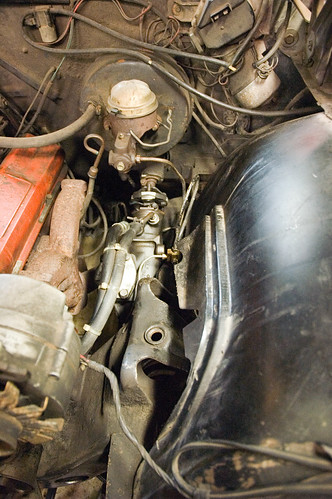
With no auto choke, starting is a bit of a pig, but it was soon started and the 327 warmed in prep for the oil change.

Then it was auto trans fluid change time. The old stuff was a) awful and b) only 2L! Around 3L of the new stuff put the level about half way twixt add and full.

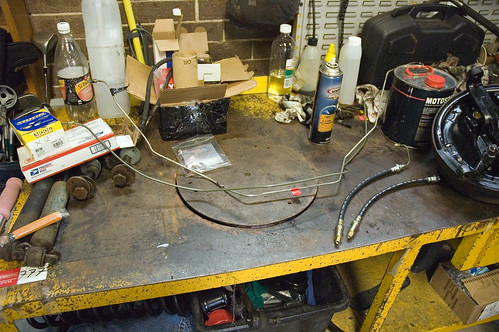
Next, the engine oil was drained (again filthy) and filter removed. We soon discovered the Ryco Z24 aint to right filter! I have a cartridge filter, so a very quick dash to Auto One, Waitara managed to acquire a Ryco R2124P (cartridge style) filter with minutes to spare before they closed on a Sunday arvo (4PM on a Sunday... for future reference ;-)!

With new filter and oil in (and sump plug washer), Joe fired up and took a quick drive up and down the street.

John + kids then left for church.

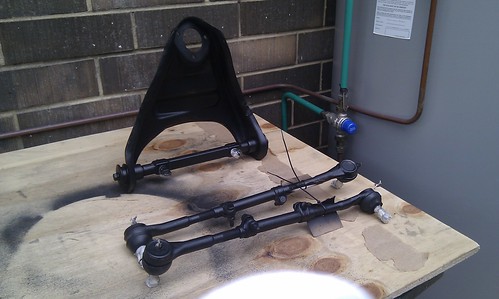
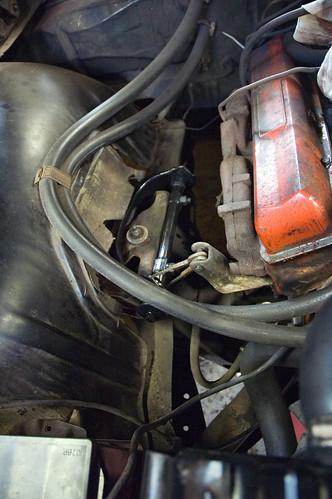
It wanted to change direction suddenly with each turn, so Joe stuck it back on the stands and it was toe-ing out. A quick adjust of the tie rod ends go the toe looking better. Another hit and all was sweet!

A great way to finish the day!

Big thanks again to JtC! Now on to the smaller stuff...

Saturday 20 August 2011

Front Suspension Done!

Finally, the front suspension and steering is back together after another productive Saturday!

LHF

Engine Bay


The keen-of-eye will noticed I hit the UCA with gloss (in lieu of satin) to match the rest of the suspension.

Brakes are bled too.

Aim to change oil, oil filter and transmission fluid tomorrow. Bolt the wheels up and drop it on the deck for the first time in a couple of months.

Need to swap the sway bar D-bushes for the correct ones. These have the right ID, but are loose in the shackle.

Also, after closer inspection, we need to replace a brake hose at the rear.

To-Do List is updated... kicking goals people, and another BIG thanks to Joe the Champion!

Sunday 14 August 2011

Painted Suspension

Cleaned up the last of the suspension (LHF UCA) and the tie rod ends and hit them with a coat of satin black.

IMAG0055


Also managed to find the missing shock absorber bolt, so we are all ready for final suspension/steering assembly.

Thursday 11 August 2011

tierodendballjointboots

Try saying that quickly... anyway, they turned up today.

TieRodEndBallJointBoots

 
A quick try of one this evening confirmed they fit, it just takes a bit of work to get the larger ID over the ball joint housing.

Also got...
  • a new fluoro trouble light to appease JtC (read: so we can actually see)
  • replacement 500W work lamp bulb
  • black acrylic rattle can

Saturday 6 August 2011

HUGE Day of Progress

Where to start!

JtC had set aside all day and night to kill as much work as possible. Thankfully on Friday we were able to source all the rigid brake line, brake hoses and brake hardware required to get stuck into the brakes today (see previous post).

Joe cleaned the the front cross member and hit it with a bit of black acrylic. While that dried, the LHF stub axle assembly was assembled... so that means all front brake slave cylinders are in, all front wheel bearings are in and both front brake/stub axle assemblies are complete.

BrakesLines06

BrakesLines04


With the brake lines out of the way, a quick clean of the steering box was prudent. Now it looks a treat!

FrontAssy01


Next, the long rigid brake line was installed. A bit of fine adjusting in the bend department got it settled in the locating clips on the cross member and lined up with the distribution block on the LHF and brake hose on the RHF. With the RHF hose attached, the brakes look brilliant! Definitely starting to come together now.

Out came the compressor which was used to blow-out the brake distribution block.

The next part was the concern leading into today; installing the front springs and getting the base of the spring engaged with the lower control arm (LCA). At full sag, the bottom coil remains caught on a boss on the LCA with a bow in the coil (see previous post: "Spring Compressor"). We would need to compress the spring slightly and bend the base of the spring to engage the boss on the LCA.

Using the jack, we compressed the spring and retained it in a compressed state using the spring retainer we bodged up earlier. Drop the jack away, bolt up the LCA, then moment of truth... can we flex the base of the spring - while compressed - to mate up with the LCA?

Piece of cake! We were worried about nothing... bonus!

Managed to forget to install the ball joint into the LCA, so went to bolt it in and the holes wouldn't line up .

Out the LCA came and "massaging" of the LCA and ball joint mounts on the bench soon ensued. Levering and hammering did the trick and soon the ball joint was in. So... back under the car, bolt up LCA to the chassis, bend spring to LCA, marry LCA and spring, jack up the LCA until the drum assembly could be installed and the ball joints done up... nice!

But of course, one of the lower ball joints had a long bolt head to act as a steering bump stop - and the other didn't. Did we pay attention and get them around the right way? Nooo...

At this point I departed with Kath and the kids go out to leave Joe to keep at it.

He swapped the bolts over, then stuck in a K-Mac shock absorber from his Monaro which means the RHF is done (aside from nipping up some bolts that need the car dropped on the ground)!

FrontSusp03

He even attached the restraining wire rope to catch the engine in the event that an engine mount breaks...

FrontAssy02


JtC continued to install the short LHF brake line, the brake line to the MC and the LHF brake hose. All that is needed now brake-wise is connect the LHF hose to the LHF slave cylinder (when the LHF stub axle is installed) and bleed away!

The last task of the evening was bolting in the centre link to the pitman arm and idler arm. Phew!

HUGE thanks to Joe once again for a massive effort and I was glad to pitch in a lot more than I have been.

Next:
- Shock absorber bolt (one has gone missing)
- Black paint (we are out)
- Tie rod end boots
- Paint LHF upper cntrl arm
- Fit LHF upper ball joint
- Paint sub frame RHS (mask spring/shocker)

Friday 5 August 2011

New Brake Bits

Brakepro Parramatta came good with new front brake hoses and short front brake line.

BrakesLines03


Close-up of the damage to the existing line and the replacement...

BrakesLines02


Managed to get the missing retainer, as well as some new washers and retaining clips.

Thursday 4 August 2011

Front Brakes

Another short stint from JtC saw the short front brake line removed and both front brake hoses. One hose was a smidge perished in one place and since the short brake line to it was well rusted in place, the decision was made to replace the lot (both front brake hoses to the slave cylinders and the short line from the LHF hose to the distribution block).
It was the LHF drum assembly's time to come apart. The old bearings came out of the hub and new inserted. So all front wheel bearings are done!

Assembly time and an Email from Joe...

Hey so I lost a bloody brake part when I was trying to put those stupid spring retainers in. The ones that hold the linings against the backing plate.

Anyway, the circular disc retainer that sits on top of the spring and the long post with the flared end sits in – it dropped on one of my attempts to install it when working at the vise. It dropped and diappeared. Have looked everywhere.

So for now, I grabbed one from the other side just to get that RHF assembly finished – it’s all done.

In this image, the bit missing is the circular disc, third in from the left – does that make sense?
http://www.impalas.com/brakes/1963-1970-chevy-impala-front-drum-brake-hardware-kit/h7017.html

We can grab one from ANY HOLDEN with drum brakes. Maybe a trip to George’s? Maybe there are some at Dad’s place??

Bloody annoying!

PROGRESS:
  • Dist block is cleaned, both front hoses are now out.
  • RHF stub axle assembly is complete, ready to install. Next to tool box.
  • LHF stub axle assembly is torn down, the wheel bearing cups are pressed in, almost ready for reassembly.
If you could clean up the backing plate (both sides of it please!) and then do your trick painting the back of it like you did on the RHF, that would be a huge help. Don’t use tape to cover the tapers this time, just those nuts if you like.

I will be up again on Saturday morning, will stay all day and night.

So we need:
  • 2 x brake hoses
  • 1 x little metal brake line to be made up (LHF – it’s still connected to the brake hose) Parts in bucket on ground under car.
  • 1 x bottle of brake fluid
  • WIRE BRUSHES!! We really need some!! Get em from Bunnings I guess.
  • Please set up the air compressor. Pump up tyres to 40psi for starters, then we can change the fittings so I can use the air line blower on the brake lines/dist block.
How does all this sound?
Joe

Tuesday 2 August 2011

Success!

Joe the Champion (JtC) came around for a short stint this morning. Within 15 mins he had the long front brake line out of the car... excellent and scum all rolled into one!

After a short phone-around, Brakepro Thornleigh had the best price for a replacement so I ran the old line up for them to duplicate. 45 minutes and $33.55 later... done!

Meanwhile back at the ranch, Joe whipped the RHF drum assembly apart, drifted the old wheel bearings out, punched in the new ones and we then packed them with grease...

FrontBrakes04

FrontBrakes07


Voila!

FrontBrakes10


Some boring reference shots to help guide reassy...

RHFbrake01

RHFbrake02


In the evening I hit the back of the drum backing plate with a wire brush, degreased it and hit it with a layer of black acrylic.

RHFbrake03


Brake hardware in bits c/w new slave cylinder, ready to go back together...

FrontBrakes09


More to follow!