 58,227.0 ml
Saturday, 15 December 2012
Saturday, 3 November 2012
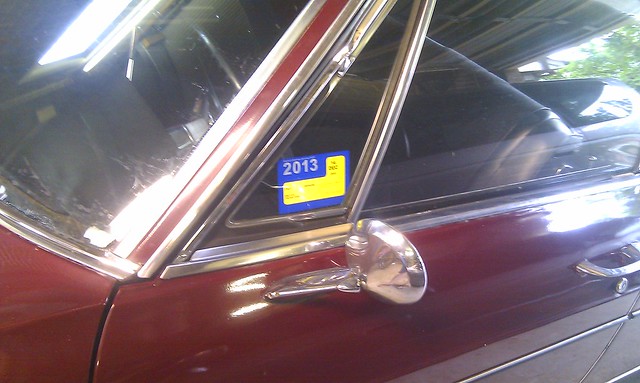
Shiny
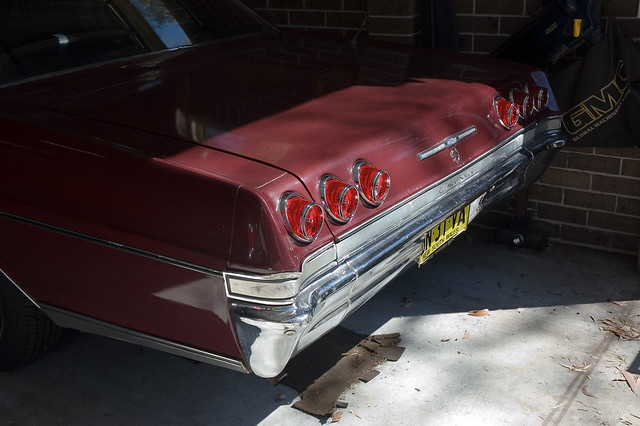
Rear trunk emblem... on!
Firstly, here is the old one:
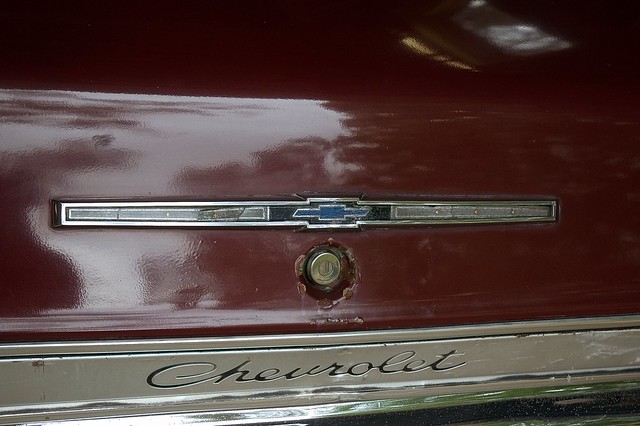
Chrome surround is ok, but the plastic insert is broken into several pieces, crazed and the colours faded.
Now for the new:

Who would have thought there were red bars either side of the Chev bowtie!
Comparison...
And one final shot:
Each time something new goes on the car, it makes it look a *lot* better... as well as highlighting worn/scratched parts around it. Now the paint chipping around the boot lock stand out that little bit more.
57980.0 m
Firstly, here is the old one:
Chrome surround is ok, but the plastic insert is broken into several pieces, crazed and the colours faded.
Now for the new:
Who would have thought there were red bars either side of the Chev bowtie!
Comparison...
And one final shot:
Each time something new goes on the car, it makes it look a *lot* better... as well as highlighting worn/scratched parts around it. Now the paint chipping around the boot lock stand out that little bit more.
57980.0 m
Saturday, 20 October 2012
New Boot Badge (Trunk Emblem!)
From: AG
Sent: Saturday, 20 October 2012 3:31 PM
To: John
Subject: RE: Car parts
Sent: Saturday, 20 October 2012 3:31 PM
To: John
Subject: RE: Car parts
Hi John,
Received OK. Photos attached.
AG


Saturday, 6 October 2012
FW: Exhaust - First Impression
From: John
Sent: Saturday, 6 October 2012 12:56 AM
To: JtC
Subject: Exhaust - First Impression
Sent: Saturday, 6 October 2012 12:56 AM
To: JtC
Subject: Exhaust - First Impression
Phil said that the original design was really weird and not good. One side of the Y was a 2.5” pipe and the other a 2” pipe? With a 2” exit from the Y and 2” muffler/system.
New system is single, 2.5” throughout. There are no flanges and Phil will simply cut the engine pipes and fab new ones to suit when it is extractor time. No turn-down on the tip, but that can be changed when the extractors are done. Muffler is made by Redback; straight-through design. He won’t use anything else as Lukey/Walker are rubbish now and the Redback is much heavier construction.
The note is AMAZING! It sounds like a bigger V8 now and more like a muscle car, but not too much… still suits the limo that it is. Like before, but bigger and more “defined”. A healthy burble that can be heard from inside the car with the windows down. Come off the accel at speed and there is the beginning of a crackle (without it crackling – if you know what I mean). Inside the garage at idle, the sound is a deep burble. Once or twice I wondered if there was a drone/resonance at a certain rev level… will be interesting to see what you think.
What surprised me was the throttle response. I was expecting the change to come more with revs, but I noticed the extra torque the instant you touched the throttle from standstill. The bonnet lifts that little bit more and you are shoved back right off the mark. It reminds me of the change when the HR went from 1-barrel Stromberg to twin barrel. Accel-wise it feels like it is 200 kg lighter. It climbed out of Ourimbah, Mooney Mooney creek and Hawksbury River
Phil also mentioned that he feels it should run cooler as the exhaust gasses aren’t as stuffed-up. I gave him a quick rundown of the past issues of overheating and said I would watch the temp light. It was a hot day and I was stuck in traffic on the short stretch between New England Hwy
Phil was impressed with the new bushes throughout and said it was a tidy car with strong engine. I mentioned that a couple of cylinders were down on comp. He said short motors/heads were cheap.
Car is dusty from workshop, so needs a clean. Phil said it got a lot of interest from mates/visitors and they asked if it was his. He left it on the rear hoist to keep people away from it.
They are my initial thoughts; come up anytime tomorrow to check it out and get tools or bring the UC and we can look at it.
J
Friday, 5 October 2012
New Exhaust
New single 2.5" exhaust system, from the exit of the Y-piece to the tailpipe c/w straight-through Redback muffler.
Big thanks to Phil at A1 Mufflers!
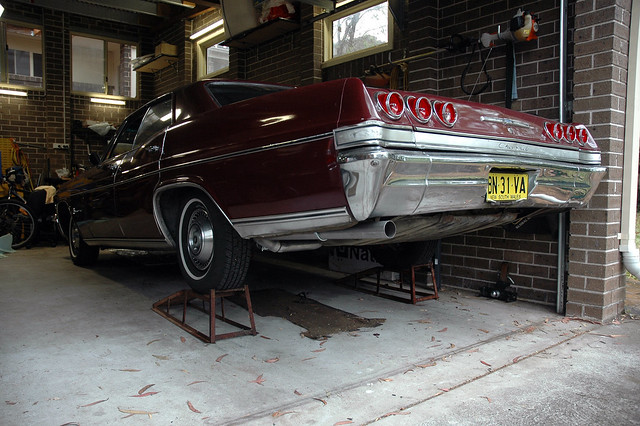
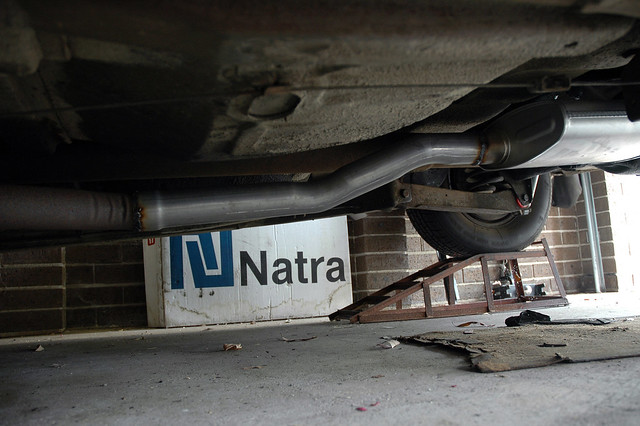
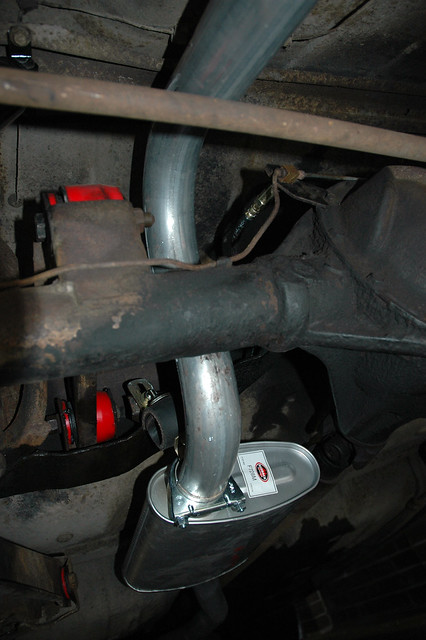
The tailpipe is tucked away and much neater than previous.
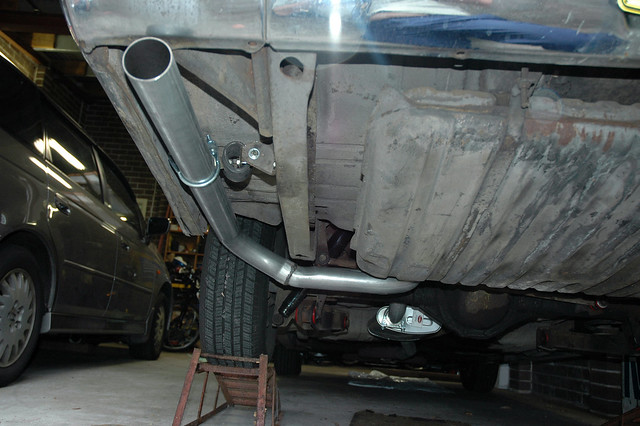
The two existing engine pipes merge at the Y-piece, then it is a new 2.5" single system from there back...
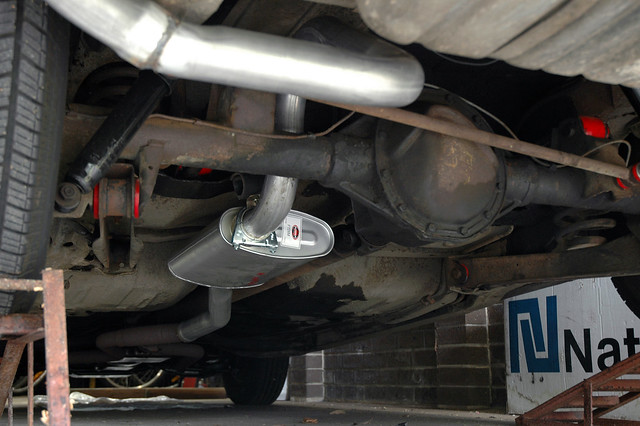
Large Redback single muffler...
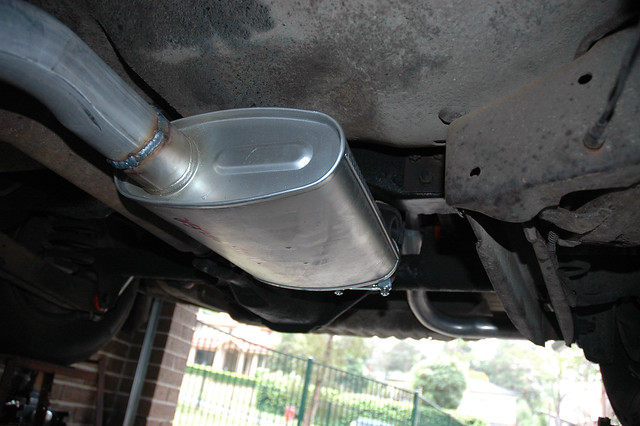
Plenty of clearance around the rear axle...
57,864.6 m
Big thanks to Phil at A1 Mufflers!
Some pics...
The tailpipe is tucked away and much neater than previous.
The two existing engine pipes merge at the Y-piece, then it is a new 2.5" single system from there back...
Large Redback single muffler...
Plenty of clearance around the rear axle...
57,864.6 m
Saturday, 8 September 2012
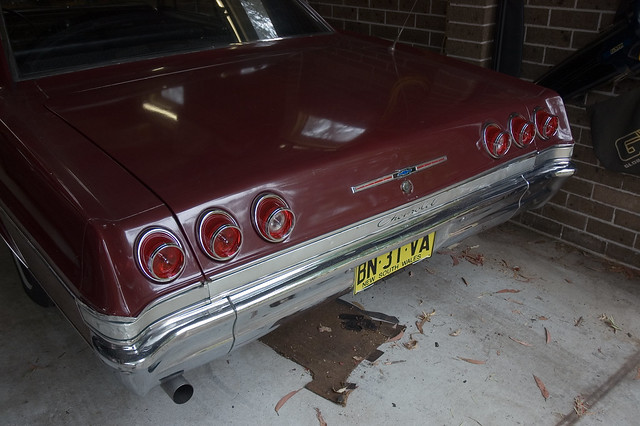
Last of the Taillights
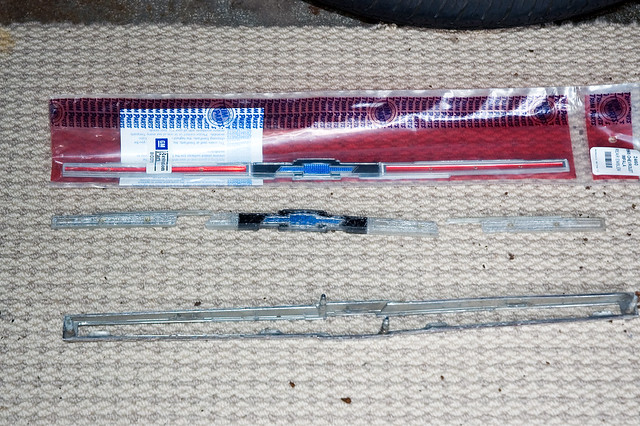
Today's task, fit the last four rear lenses.
The original body gaskets were in good condition; which is handy as I didn't have replacements!
The mounting bezels cleaned-up well...
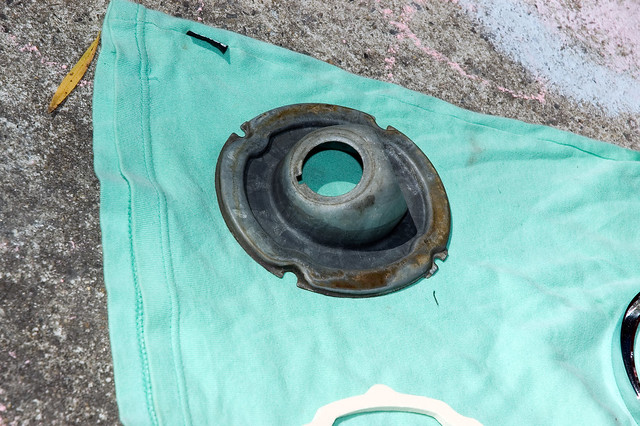
Exploded view of existing bezel and new bits...
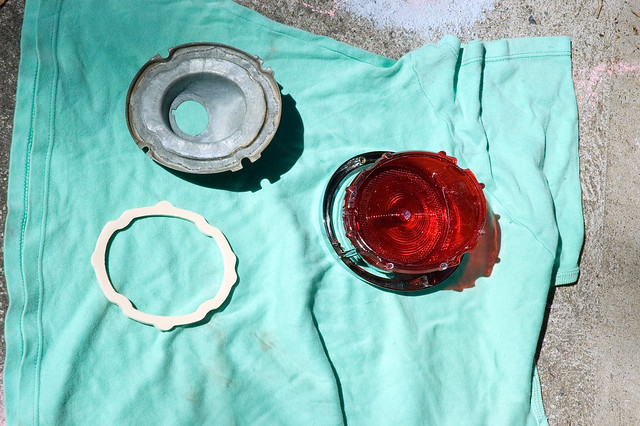
Last 4 of 6 tail lights installed...
57,779.6 m
The original body gaskets were in good condition; which is handy as I didn't have replacements!
The mounting bezels cleaned-up well...
Exploded view of existing bezel and new bits...
Last 4 of 6 tail lights installed...
57,779.6 m
Saturday, 1 September 2012
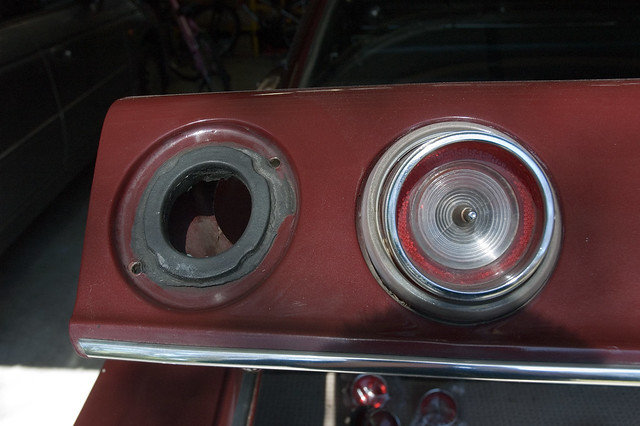
Replacing rear lenses
Time to start changing-out the tail light/reverse light lenses that I got for my birthday.
One of these things is not like the other...
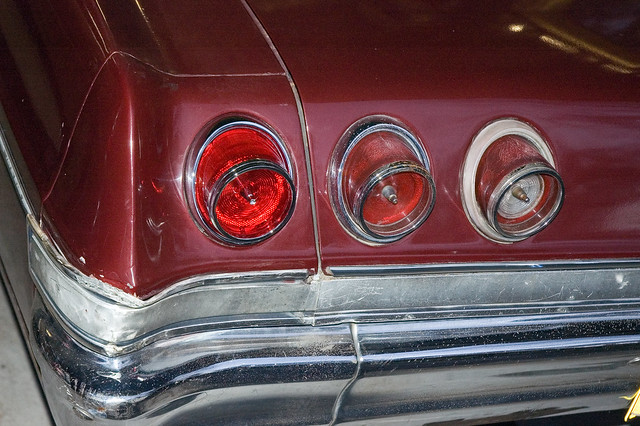
This is gonna' be good!
One of these things is not like the other...
This is gonna' be good!
Sunday, 5 August 2012
Interior Done!
JtC came up to investigate my recent handiwork and to help put the front seat in.
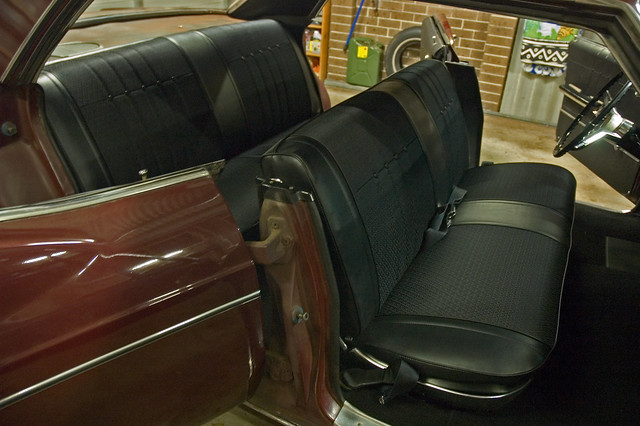
First job was to fix up my shoddy work and locate the rear seat properly <slap forehead>...
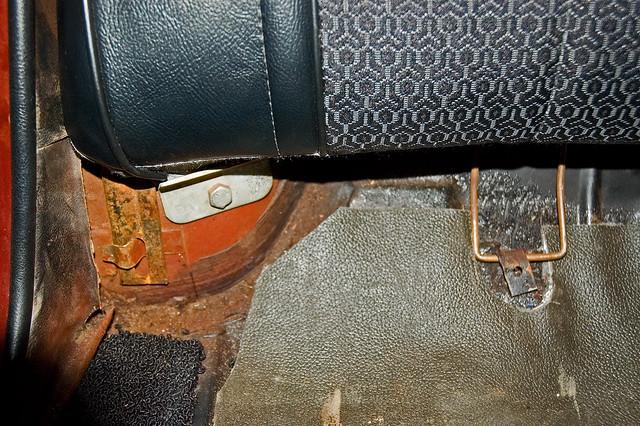
Metal tabs and clips on the body wrap around the rear seat back wire and clip through holes to hold the seat firmly in place. Don't want to do that more than necessary; I am sure bending these tabs a few times more would snap them off from fatigue; but the result is super solid.
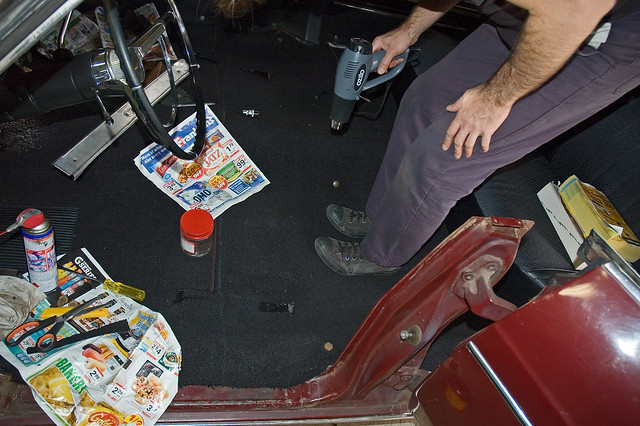
Next was to finish the carpet and get it settled in its final resting position. Patches of contact adhesive in stubborn spots helped fix it in place. The rest of the carpet was weighed-down (with phone books, standing, pressing, etc.) and heated (with heat gun) to finally locate it...
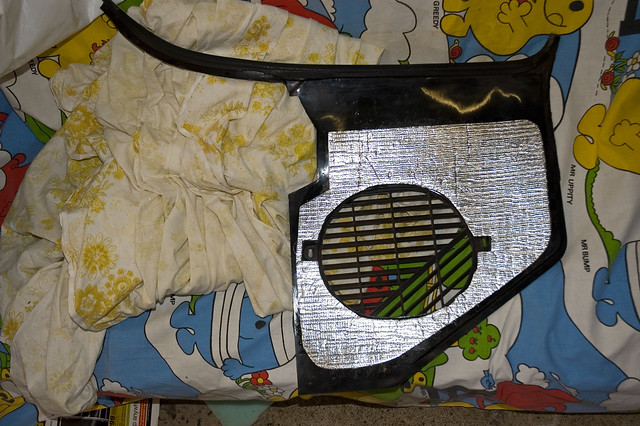
Any insulation backing to the kick panels had deteriorated into nothingness; so they were quickly cleaned up, new backing was profiled out of left-over foam and glued into place with contact adhesive...
Finally it was time to fit the front seat. Two-man lift into the car, laid on the back seat and propped-up with a length of wood, ready to be fitted-out with mounting rails and chrome trim ...

This method worked a treat as once mounting rails were fixed onto the seat, the seat was simply rotated into position for bolting to the floor.
One of the latch wire tensioners was missing, so JtC made up a replacement from a peg board hook. The result is fully-functioning seat adjustment. Noice!
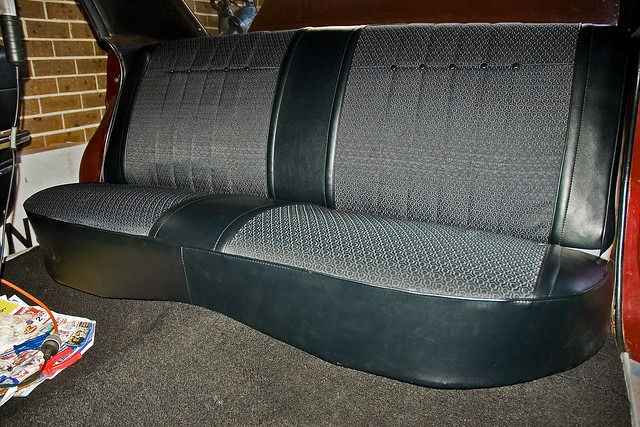
The result...
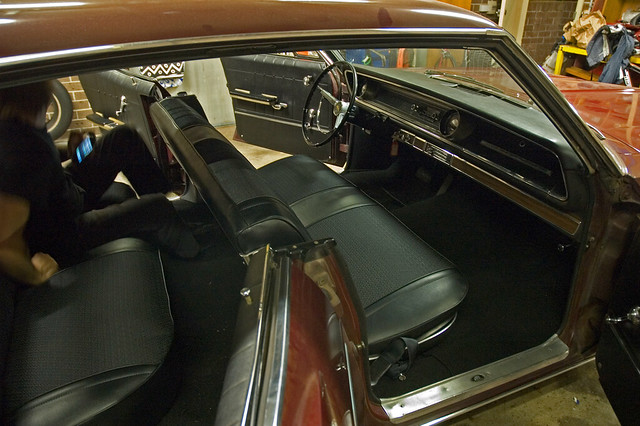
I am over the moon!
New seat covers + carpet has transformed the car and the interior now looks stunning! The black-on-black interior with chrome trim really makes the Impala look like the land yacht limo that it is... fabulous stuff!
HUGE thanks to JtC... couldn't have done it without you.
There is a layer of dust over everything, so time for a BIG clean.
John out.
First job was to fix up my shoddy work and locate the rear seat properly <slap forehead>...
Metal tabs and clips on the body wrap around the rear seat back wire and clip through holes to hold the seat firmly in place. Don't want to do that more than necessary; I am sure bending these tabs a few times more would snap them off from fatigue; but the result is super solid.
Next was to finish the carpet and get it settled in its final resting position. Patches of contact adhesive in stubborn spots helped fix it in place. The rest of the carpet was weighed-down (with phone books, standing, pressing, etc.) and heated (with heat gun) to finally locate it...
Any insulation backing to the kick panels had deteriorated into nothingness; so they were quickly cleaned up, new backing was profiled out of left-over foam and glued into place with contact adhesive...
Finally it was time to fit the front seat. Two-man lift into the car, laid on the back seat and propped-up with a length of wood, ready to be fitted-out with mounting rails and chrome trim ...
This method worked a treat as once mounting rails were fixed onto the seat, the seat was simply rotated into position for bolting to the floor.
One of the latch wire tensioners was missing, so JtC made up a replacement from a peg board hook. The result is fully-functioning seat adjustment. Noice!
The result...
I am over the moon!
New seat covers + carpet has transformed the car and the interior now looks stunning! The black-on-black interior with chrome trim really makes the Impala look like the land yacht limo that it is... fabulous stuff!
HUGE thanks to JtC... couldn't have done it without you.
There is a layer of dust over everything, so time for a BIG clean.
John out.
Saturday, 4 August 2012
Padding
A trial fit of the front carpet showed it wasn't sitting down too well across the transmission tunnel; more padding required.
I covered the whole tunnel with a second layer of foam...
...then another layer of underlay (didn't get a shot of that) to really increase the volume of the transmission tunnel.
Worked well.
I covered the whole tunnel with a second layer of foam...
...then another layer of underlay (didn't get a shot of that) to really increase the volume of the transmission tunnel.
Worked well.
Sunday, 29 July 2012
Half-way there
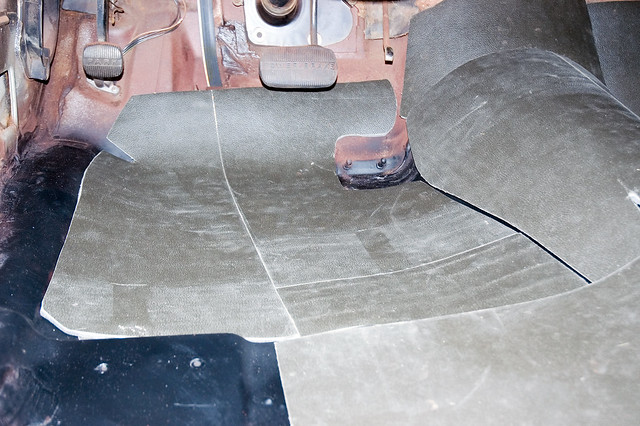
After much trimming and adjusting and gluing, the rear carpet is in place...
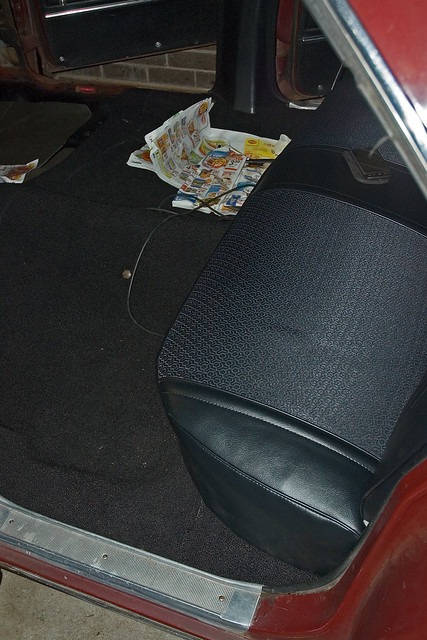
Notice also the rear seat; a couple of hours of trial fitting finally resulted in this...
Noice!
The front seat rails were cleaned-up and given a lick of paint a week ago...
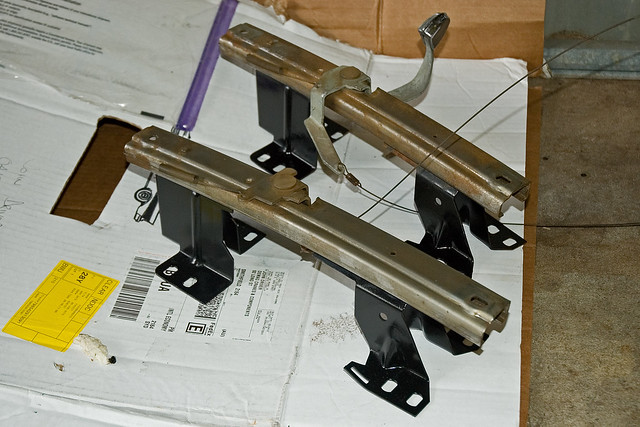
Using them as a template, I could cut the front of the rear carpet to suit.
Getting close now!
J
Notice also the rear seat; a couple of hours of trial fitting finally resulted in this...
Noice!
The front seat rails were cleaned-up and given a lick of paint a week ago...
Using them as a template, I could cut the front of the rear carpet to suit.
Getting close now!
J
Sunday, 15 July 2012
FW: Carpet Stuff
From: JohnSent: Sunday, 15 July 2012 7:43 PM
To: JtC
Subject: Carpet Stuff
Howdy!
Glued the carpet to the underlay last night and used up all the last of the contact adhesive (which is good as the lid was glued shut and I had to puncture the can to pour the remnant out). Also made up a sheet of foam/vinyl laminate from off cuts to use to fill in gaps. I filled up a couple of gaps last night.
Today, got another tin of adhesive and a new brush. Glued down the front and trimmed the carpet back around the passenger-side B-pillar. Looks good.
I glued down enough to pick up the underlay, but I didn’t do any around the accel pedal as it would have been a fiddle doing it right with only one person. I figured that can be glued down out of the car.
I figure the plan from here on in is…
- take the carpet/underlay out of the car and finally glue it down.
- pack-up any low spots with underlay off-cuts + fill-in any sound insulation gaps that need doing.
- punch holes
- final trim of the carpet
- install trim/seats
Thoughts?
John
Sunday, 8 July 2012
Jigsaw Puzzle #2
Day two of "Interior Weekend".
Weather was stunning, so we setup a make-shift workbench on the driveway in the sun and set to work gluing and trimming the vinyl onto the foam...
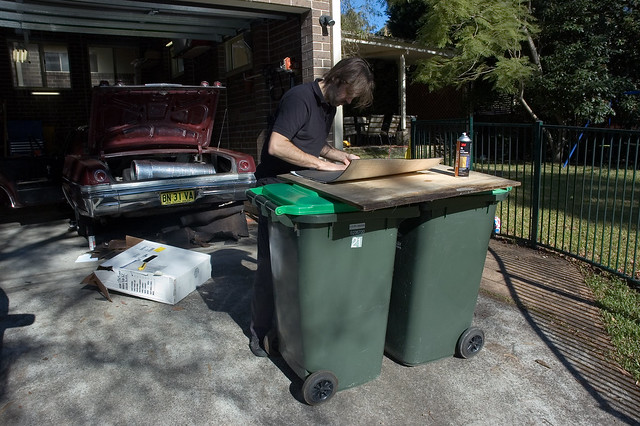
We got a bit of a production line going, so made-up all the patches before sitting them in place.
Once all the foam/vinyl laminate pieces were made, I had to head off. I left JtC to fine-tune the fit of the jigsaw puzzle on the floor pan, then tack them in place with a minimal amount of contact adhesive.
The result (before tacking down)...

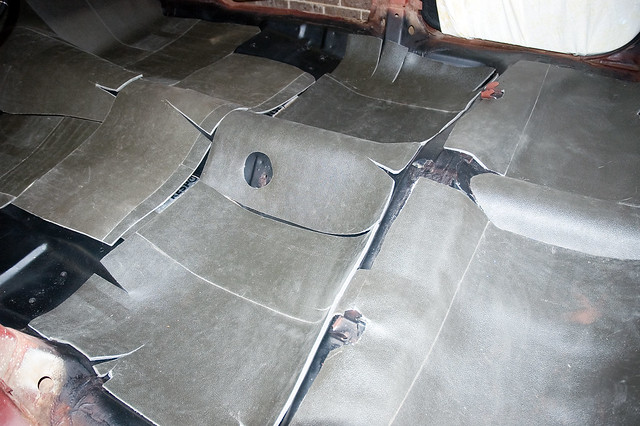
The result is excellent! The mass loaded vinyl is very heavy, but very pliable, so it sits the foam/vinyl in place nicely.
All pieces are in place now, tacked-down and JtC finished the day by laying-out the rear carpet underlay; trimming it to suit.
Phew! A *massive* weekend of interior arts and crafts. Again, a HUGE thanks to JtC for coming up both days and knocking over a huge amount of work.
Carpet next, stay tuned...
John out
Weather was stunning, so we setup a make-shift workbench on the driveway in the sun and set to work gluing and trimming the vinyl onto the foam...
We got a bit of a production line going, so made-up all the patches before sitting them in place.
Once all the foam/vinyl laminate pieces were made, I had to head off. I left JtC to fine-tune the fit of the jigsaw puzzle on the floor pan, then tack them in place with a minimal amount of contact adhesive.
The result (before tacking down)...
The result is excellent! The mass loaded vinyl is very heavy, but very pliable, so it sits the foam/vinyl in place nicely.
All pieces are in place now, tacked-down and JtC finished the day by laying-out the rear carpet underlay; trimming it to suit.
Phew! A *massive* weekend of interior arts and crafts. Again, a HUGE thanks to JtC for coming up both days and knocking over a huge amount of work.
Carpet next, stay tuned...
John out
Saturday, 7 July 2012
Jigsaw Puzzle #1
"Interior Weekend" begins!
Before JtC's arrival, the sound deadener went down.
Drumming the floor pan with my knuckles, I found where the resonance was worst. I then cut out paper templates and placed them in situ...
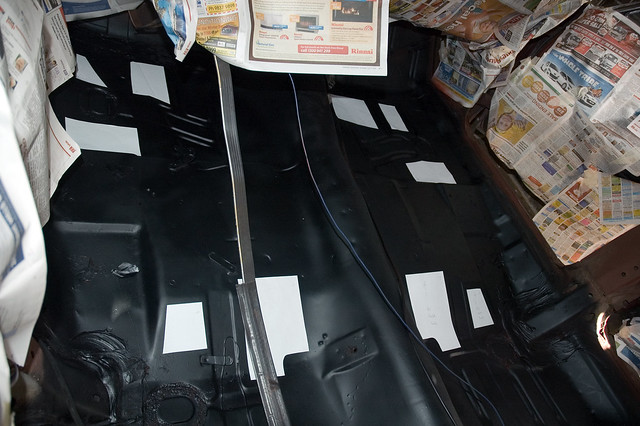
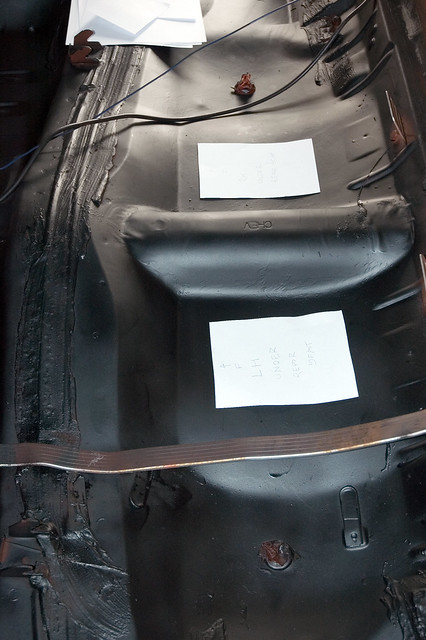
You can also see the flat black paint job and "CHEV" stamping on the floor pan under the rear seat.
The templates were then labelled and transferred onto the sheet of deadener, ready for cutting...

The sheet was then cut-up, floor pan cleaned with wax & grease remover, dried with the heat gun and the pieces stuck into position. The old skateboard that made an appearance previously in moulding the radiator fan shroud, was pressed into service again to press down each patch.
The result...
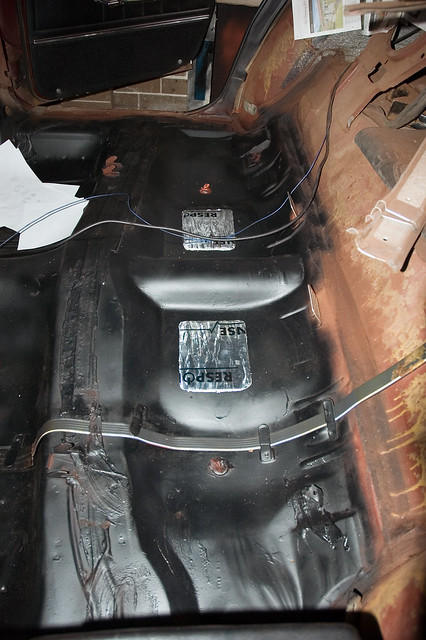
Voila!
JtC further masked off the dash and gauges. He then went to work respraying the column in satin black. It was scratched badly, so having an all-black steering column all freshly sprayed is excellent. The result is really good.
Amongst all this, Carl called and said the seats were ready! I hopped over and picked them up. Rats had eaten-out the rear DS back cushion, so Carl had to build it up with foam.
The result is stunning! Can't wait to get the interior finished now.
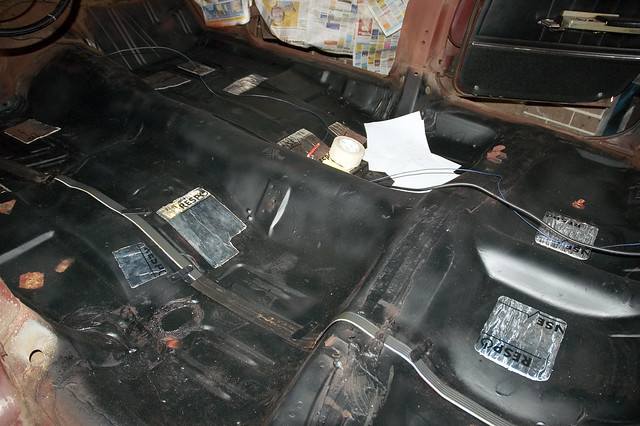
A strip of mass-loaded vinyl was placed over the body harness.
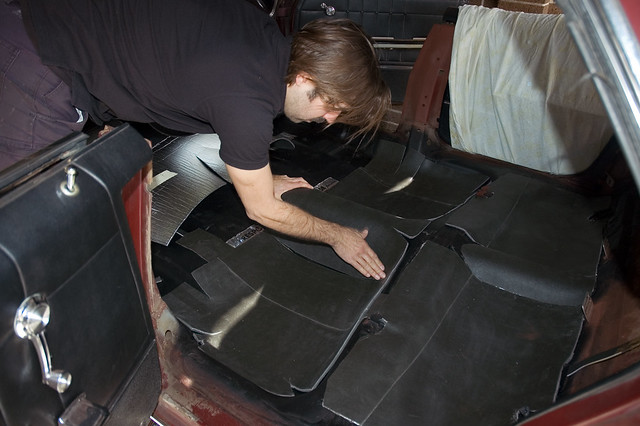
On my return, I cut the foam up into pieces, using the old sound deadener as templates. We stuck down the foam patches under the rear seat; then cut and glued patches of vinyl on top...
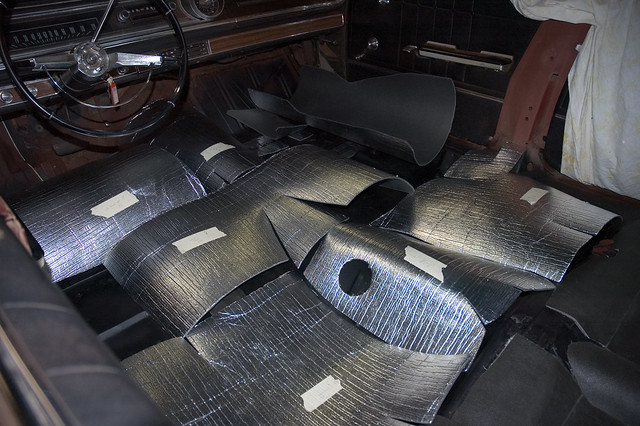
(the second photo shows the foam sections pre-cut and placed in situ)
This method was rubbish! Though the result was good, it was taking AGES. The decision was made to glue and trim the vinyl onto to foam out of the car... then fit the foam/vinyl laminate onto the floor.
Tomorrow's job!
Before JtC's arrival, the sound deadener went down.
Drumming the floor pan with my knuckles, I found where the resonance was worst. I then cut out paper templates and placed them in situ...
You can also see the flat black paint job and "CHEV" stamping on the floor pan under the rear seat.
The templates were then labelled and transferred onto the sheet of deadener, ready for cutting...
The sheet was then cut-up, floor pan cleaned with wax & grease remover, dried with the heat gun and the pieces stuck into position. The old skateboard that made an appearance previously in moulding the radiator fan shroud, was pressed into service again to press down each patch.
The result...
Voila!
JtC further masked off the dash and gauges. He then went to work respraying the column in satin black. It was scratched badly, so having an all-black steering column all freshly sprayed is excellent. The result is really good.
Amongst all this, Carl called and said the seats were ready! I hopped over and picked them up. Rats had eaten-out the rear DS back cushion, so Carl had to build it up with foam.
The result is stunning! Can't wait to get the interior finished now.
A strip of mass-loaded vinyl was placed over the body harness.
On my return, I cut the foam up into pieces, using the old sound deadener as templates. We stuck down the foam patches under the rear seat; then cut and glued patches of vinyl on top...
(the second photo shows the foam sections pre-cut and placed in situ)
This method was rubbish! Though the result was good, it was taking AGES. The decision was made to glue and trim the vinyl onto to foam out of the car... then fit the foam/vinyl laminate onto the floor.
Tomorrow's job!
Friday, 6 July 2012
It's all happening!
2nd coat of primer went on and picked-up the mass-loaded vinyl from Jaycar (04/07/2012).
This morning, dropped off the seats and covers to the trimmer (Carl @ North Rocks... all good, he was crook last week). He is currently doing the interior for a Chrysler 300C ready for MotorEx, but was happy to fit the Chev seats in between.
This evening, 1st coat of flat-black spray enamel on at ~ 6:30 PM. 2nd coat on at ~ midnight!
Needed to get all painting on and dry ready for a weekend of interior fit-out.
Saturday, 30 June 2012
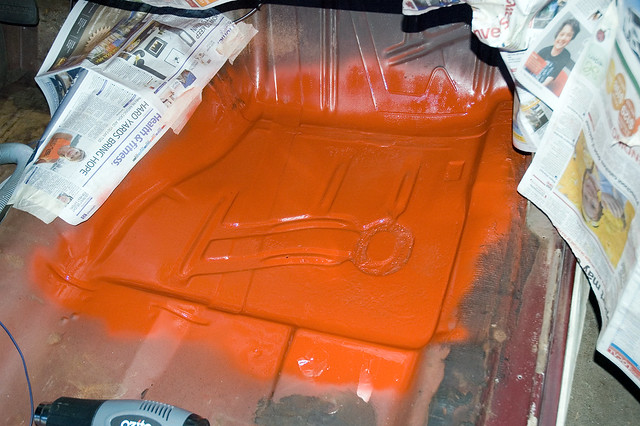
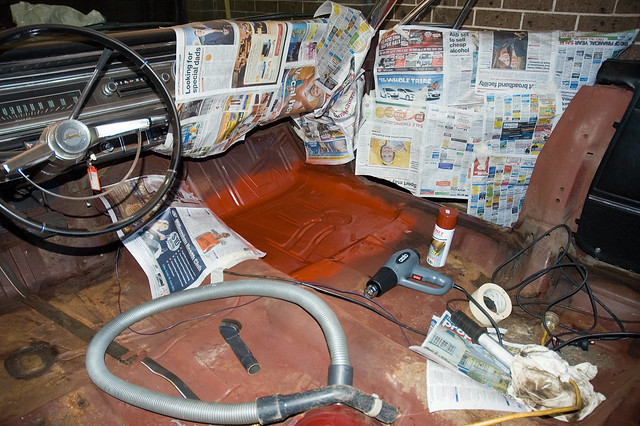
Floor Pan Priming
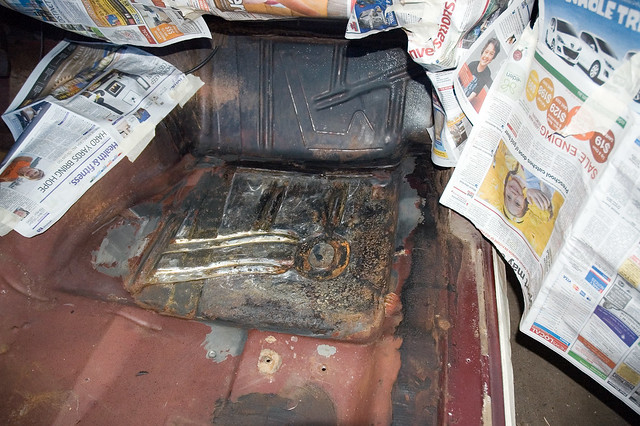
Taped masking paper throughout the interior and glass and sanded-back any remaining areas of surface rust.
Under the rear seat there was a little bit, due to the urine from the vermin that lived there. It was good JtC wasn’t there for that as it STANK big time! He would have been dry-reaching all over the place.
All tidied up now. Washed down, heat gun to dry, prepsol to clean, heat gun again then paint. Finished off the can so will get another can on Monday to do a final coat through the week.
Also, I let all the smoke out of my $5 drill that we were using for wire-brushing. It just shut off in my hand with spoke pouring out of it. Glad I wasn’t electrocuted.
Result...
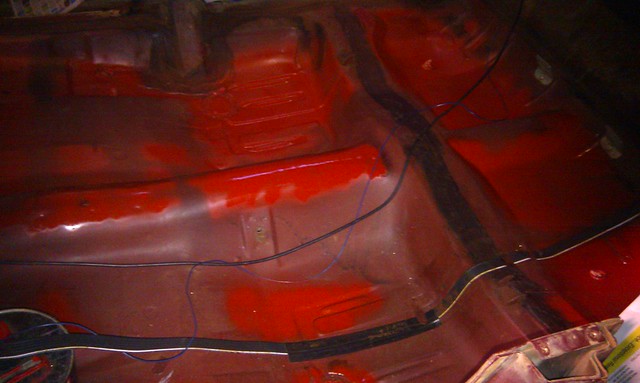
J
Under the rear seat there was a little bit, due to the urine from the vermin that lived there. It was good JtC wasn’t there for that as it STANK big time! He would have been dry-reaching all over the place.
All tidied up now. Washed down, heat gun to dry, prepsol to clean, heat gun again then paint. Finished off the can so will get another can on Monday to do a final coat through the week.
Also, I let all the smoke out of my $5 drill that we were using for wire-brushing. It just shut off in my hand with spoke pouring out of it. Glad I wasn’t electrocuted.
Result...
J
Friday, 29 June 2012
FW: Seats?
-----Original Message-----
From: John
Sent: Friday, 29 June 2012 10:15 AM
To: JtC
Subject: RE: Seats?
Urgh... slight problem with trimmer. No answer on mobile, no answer on
work phone, waited around till 10AM yesterday - no show. Tried to phone
again this morning... no luck.
Perhaps he is on holidays/sick?
Am contemplating trying a trimmer close to work, otherwise I'll wait-out
the weekend and try again on Monday on the hope he has simply taken this
week off.
On the sound deadener front, I now have a sheet of deadener from Jaycar
to cut up and stick to the metal in patches.
They didn't have enough stock of the heavy vinyl (replacement for
tar-backed cardboard) so are ordering it in and that is expected to
arrive Tue.
I also have 5 mm foam and spray adhesive from Clark Rubber.
So we certainly have some bits and pieces to start with tomorrow.
J
-----Original Message-----
From: JtC
Sent: Friday, 29 June 2012 10:00 AM
To: John
Subject: Seats?
How is all your running around sourcing stuff for tomorrow going? Lemme
know if I can do anything.
Did you deliver the seats and trim ok?
Very exciting.
Wednesday, 27 June 2012
Christmas in July (well... late June)
Both the new seat covers and my new tail lights (a birthday gift... thanks baby!) turned up at work today.
Packed
2nd (and final) coat of primer went on the front passenger-side foot well this evening, then packed the Commodore with the benches and new seat covers ready to drop-off to the trimmer tomorrow morning.
Saturday, 23 June 2012
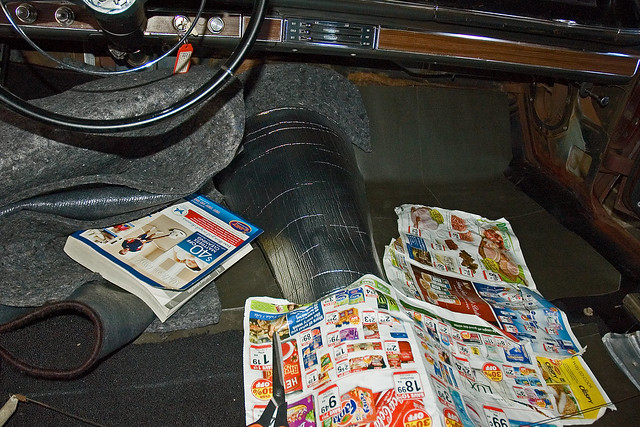
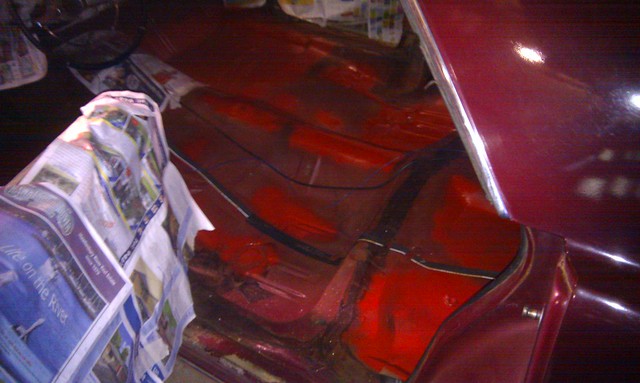
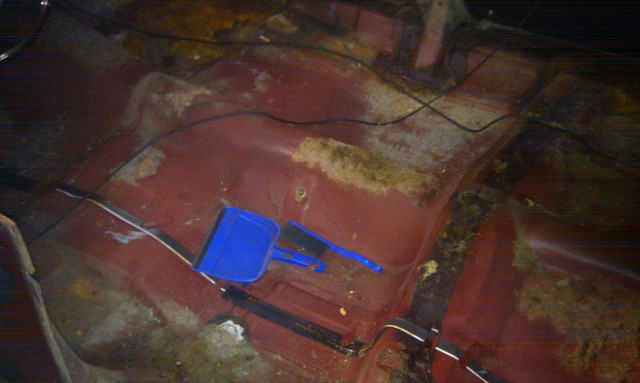
Prepping the Floor
Acquired a heat gun to put some heat into the floor to aid paint drying, as well as a 80 grit flapper disc for the angle grinder to assist cleaning-up any surface rust.
After wire-brushing but before sanding with the flapper disc...
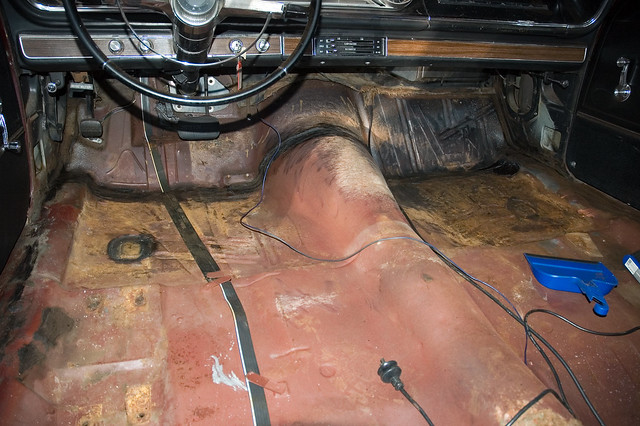
All fawn colouring isn't rust, but remnants of the old carpet underlay.
The worst of the corrosion was in the passenger side front foot well, so I hit it with the flapper disc.
Result...
Cleaning ensued and the bare metal hit with Galmet primer...
Hopefully I can hit it with a 2nd coat through the week, ready to put sound deadener down next weekend.
J
After wire-brushing but before sanding with the flapper disc...
All fawn colouring isn't rust, but remnants of the old carpet underlay.
The worst of the corrosion was in the passenger side front foot well, so I hit it with the flapper disc.
Result...
Cleaning ensued and the bare metal hit with Galmet primer...
Hopefully I can hit it with a 2nd coat through the week, ready to put sound deadener down next weekend.
J
Sunday, 17 June 2012
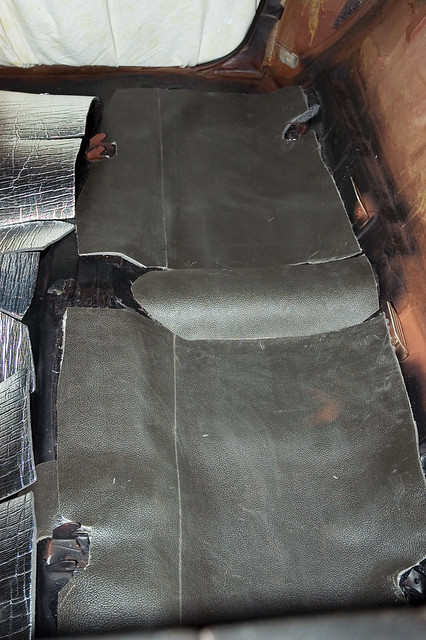
Reverse Jigsaw
Sound deadener has been stripped out and the floor pan is in good nick...
I have kept and labelled each piece to use as templates for the replacement pieces; here stacked in the boot for storage...
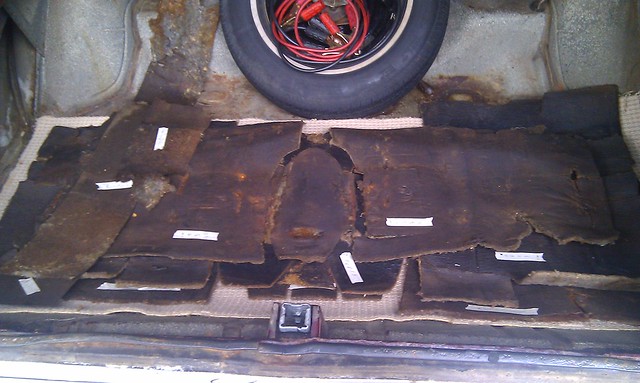
J
I have kept and labelled each piece to use as templates for the replacement pieces; here stacked in the boot for storage...
J
Subscribe to:
Posts (Atom)