Showing posts with label power steering pump. Show all posts

Monday, 26 February 2018

Hydro-boost

Brakes always had a fair travel and needed a lot of force to haul the car up. The brake system couldn't lock the wheels and so the engineer wanted to see something better.

The disc brake conversion came with 1" bore master and 9" dia single diaphragm booster.

Swapped the booster for a dual diaphragm 8"... no dice.

Ended up going for a 1 1/8" bore master to reduce the stroke and a Hydro-boost brake booster to give the extra "oomph" required...

Hydroboost01


Made up high pressure hoses using Speedflow AN-6 fittings and Speedflow high pressure power steering hose...

Hydroboost03


Installed...

Hydroboost04


Wow! Chalk and cheese!

Standing on the brakes will lock all four tyres now. It has transformed the car and the engineer is well happy.

For anyone going to 4-wheel discs on an Amercian full-size, don't muck around with vacuum boosters... go with a Hydro-boost unit.

JRD

Monday, 30 May 2016

Ancillary Drive (the devil is in the details)

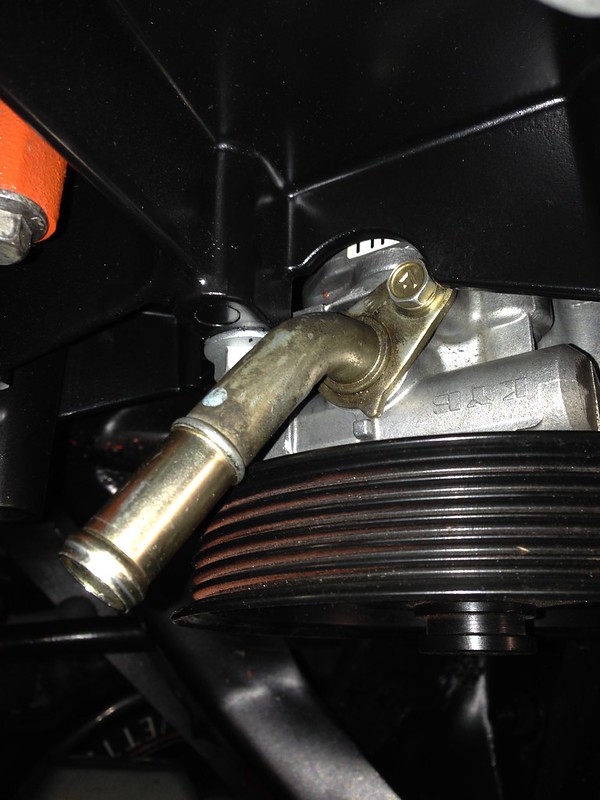
The VZ Commodore power steering pump had the inlet pipe pointing in the wrong dimension.

Originally the plan was to try and bend/twist the inlet pipe but too hard in the end.

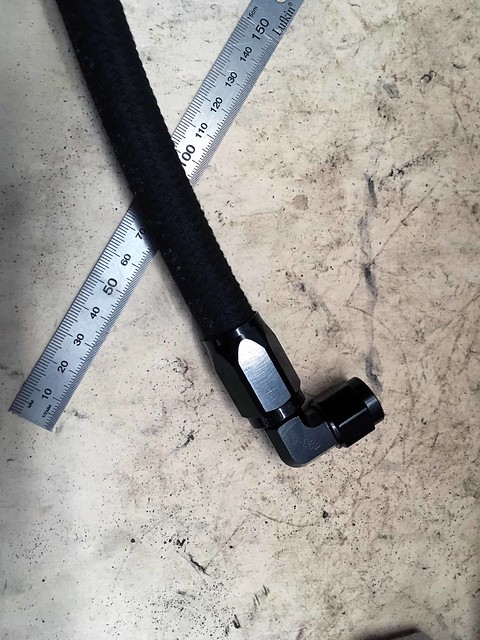
Plan-B: source a new inlet pipe.

The KYB make of power steering pumps have an inlet that pushes into an o-ring and is held in place by a keeper plate. From various photos throughout the web, it looked like KYB standardised on the pipe diameter/keeper plate arrangement and simply changed the direction the pipe was bent to suit the vehicle it was going into.

After a bit of a dig through photos and visiting the wrecker near work with a set of verniers, I went for a second hand Hyundai unit from eBay.

The inlet pipe was duly unbolted and - thanks goodness - has an identical mounting arrangement to the Commodore's!

It was soon bolted to the Commodore pump and dummy-fitted to the ancillary drive bracket...

Hyundai Pump 03


So the orientation of the inlet is MUCH better. You can see in the photo that the relief in the bracket sits hard against the keeper plate bolt. The angle grinder came out and five millimeters was quickly removed.

Went ahead and bolted the alternator, idler pulley and tensioner into place. Juuust managed to get the Commodore drive belt on (need to get a longer one) with the tensioner at the extremity of its travel...

Hyundai Pump 04

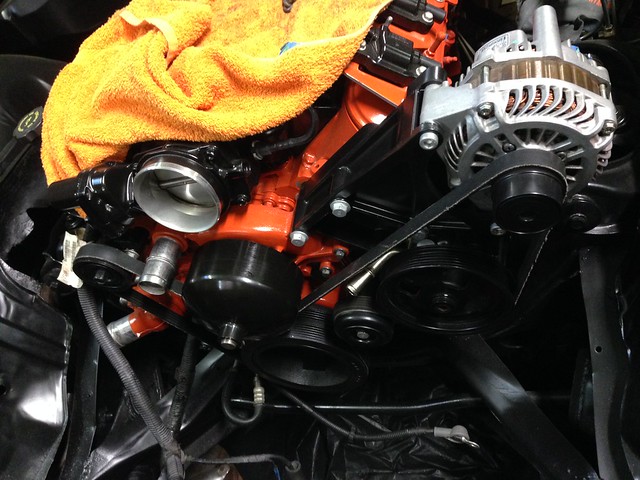
Evident in the photo above, the power steering pump inlet peeks out between the belt and the power steering pump pulley.

It is all a bit tight for my liking so time for Plan-C, enter one Mitsubishi Lancer power steering pump...

Lancer_PS_01

Here the inlet is vertical into the pump, so no belt clearance issues (I hope!).

I pick it up next week, stay tuned.

J

Saturday, 7 May 2016

Stuff

Sat was two hours spent mucking around getting the Chev up on stands. Pain of a job with the engine pipes getting in the way of everything to do with the trans. All good now and spent the time getting a setup which has good access. I turned the front wheels to help the passenger side engine pipe clear the steering link, then brought the chain block over and used fabric slings under the engine pipes to lift them up, it has worked really well and we now have a clear floor under the Chev. I have sat the end of the trans on one of my old ratchet stands with bricks/wood blocks under it to trim the height, so now it is an easy task to trim the gearbox level with the trolley jack as-required.

Sat night I bolted the ancillary drive bracket onto the engine. Looks good. The problem I had feared re. the power steering input was realised... it fouled the bracket/pulley.

Attached is a photo...


You can see the brass-coloured tube that is simply pushed into the pump housing, sealed with an o-ring and retained with the keeper plate you can see.

It needs to be clocked 90 degrees (and you'll notice a second keeper plate retaining bolt hole in the housing) but if you do, the tube hits the pulley. This isn't a problem, I simply bent the tube outwards using 2 x 3/8" extensions. But the second bolt hole is not tapped + mocking it up in the bracket, the keeper plate fouls the bracket in the clocked position.

So the next trick (and where I am up to) is to twist the tube in the keeper plate to maintain the keeper plate position, but have the tube pointing outwards at 90 deg.

J

Wednesday, 4 December 2013

Booking for Pink Slip + Tack Welds

Firstly the bad news, power steering pump is leaking so that is the next project. Showed me the spot on the floor where it was left overnight. It was leaking onto the cross member then dropping off there. Chris reckons Eagle Spares have them for ~ $150. Doesn't sound like a huge deal.
 
Good news is he passed it.
 
I chatted to him about cocking the rear calipers so the bleed nipples were horizontal and left the quick instruction card from the kit on the front seat with the rego papers. When I explained it to him he seemed to know all about it.
 
The pedal is the same as when I dropped it off. Not long, springy or pump-up.
 
See mounting tab photo attached (sorry for quality). Didn't quite get high enough to see all the weld.


Tyres rebalanced to make way for dress ring mounting. He had the perfect style of dress ring out the back (with sharp edge to it), but it was 14" dia.
 
pink slip
weld tabs
4 x wheel balance
$100
 
J