Showing posts with label disc brakes. Show all posts

Monday, 26 February 2018

Hydro-boost

Brakes always had a fair travel and needed a lot of force to haul the car up. The brake system couldn't lock the wheels and so the engineer wanted to see something better.

The disc brake conversion came with 1" bore master and 9" dia single diaphragm booster.

Swapped the booster for a dual diaphragm 8"... no dice.

Ended up going for a 1 1/8" bore master to reduce the stroke and a Hydro-boost brake booster to give the extra "oomph" required...

Hydroboost01


Made up high pressure hoses using Speedflow AN-6 fittings and Speedflow high pressure power steering hose...

Hydroboost03


Installed...

Hydroboost04


Wow! Chalk and cheese!

Standing on the brakes will lock all four tyres now. It has transformed the car and the engineer is well happy.

For anyone going to 4-wheel discs on an Amercian full-size, don't muck around with vacuum boosters... go with a Hydro-boost unit.

JRD

Saturday, 12 September 2015

Rear Brake Caliper Adjustment

Ever since converting to four wheel disc brakes, I have never been able to lock the rears and only just lock the fronts under hard braking. The Chev has always felt like it stopped well at low to medium demands, but hit the brakes hard and it would continue on further than I would have thought it would and certainly further than I like.

Time to try this: "Right Stuff" Rear Disc Installation Support

Up on stands, rear wheels off and pull the emergency brake actuation levers apart...

Wheel Off


The rear discs didn't look like they had seen much use. Cross-hatching still visible....

Caliper + Pad + Rotor Hatching


Adjusting the emergency brake actuation... the right rear was pretty good, though the left rear could be wound out a turn and still have the lever placed against the end stop...

Handbrake Lever - Spring + Cable Removed


Back together and go for a test drive. Much better!

The pulls up quicker and the brake balance is good. I managed to lock the right rear under hard braking on the way to the servo with an empty petrol tank. Once filled, the extra weight at the back meant all four tyres would be on the verge of locking under heavy braking, with a front locking preferentially.

No brake fluid escaped during the adjustment, but the pedal does get harder after one pump so a bleed wouldn't go astray.

I'll also double-check that I have adjusted the emergency brake correctly, so there is no slack in the emergency brake system when released, but the caliper actuation lever is still on the end stop.

J

Friday, 29 November 2013

Disc Brake Conversion Timeline

Monday 03.11.2013 Evening
Car on stands
Drain diff

Tuesday 05.11.2013 Evening
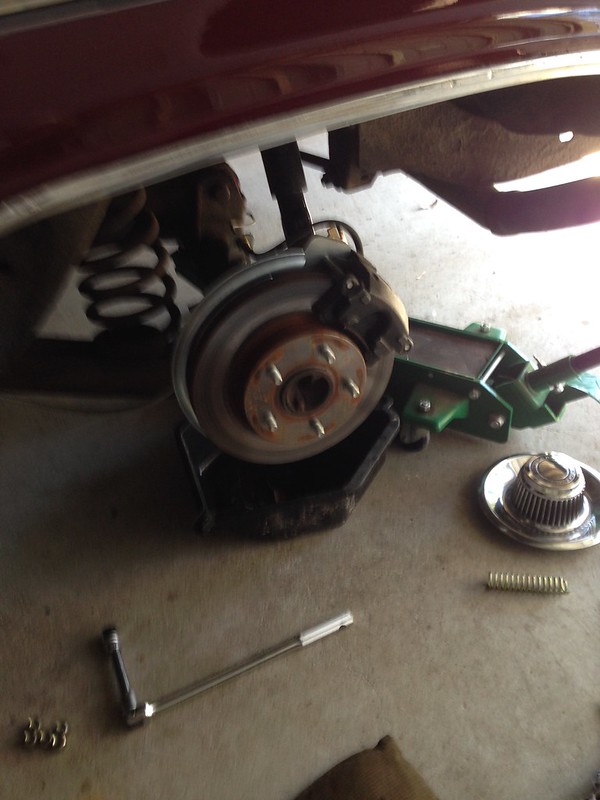
Rear axles out
Bolt-on rear caliper adaptor brackets
Trial fit rotors and calipers

Wed 06.11.2013 Day
Purchase 2 x new rear axle housing seals
Purchase a new diff cover gasket
Purchase a replacement diff centre retaining pin
Purchase 10 x wheel studs
Purchase 10 x wheel nuts

Thu 07.11.2013 Day
Old studs removed
Purchase diff oil

Thu 07.11.2013 Evening
New studs pressed on axle
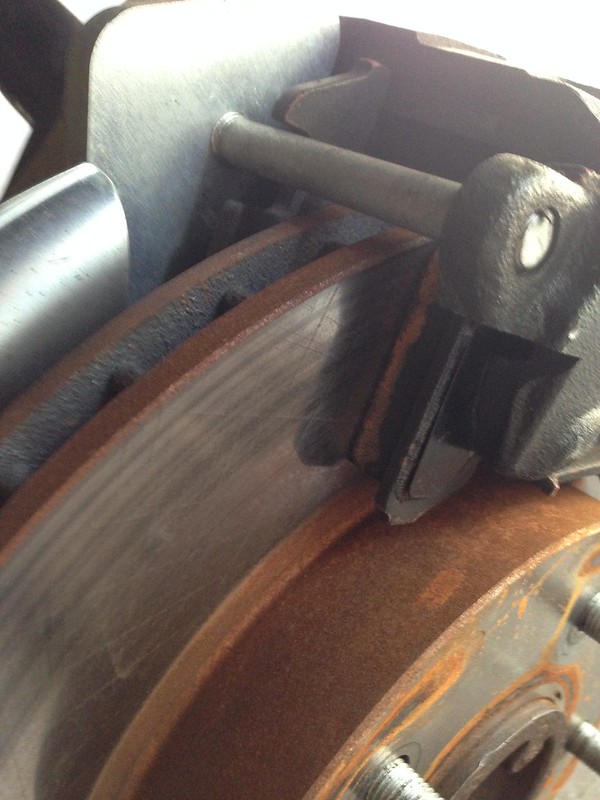
Remove rear disc hardware
File-finish axle housing flanges
Fit new axle seals
Refit rear disc hardware with new nuts
Refit axles with C-clips
Clean pin retainer and pin retainer cavity
Locate spider gears, insert pin
Fit pin retainer with Loctite
Fit hat with new gasket
Loose-fit calipers
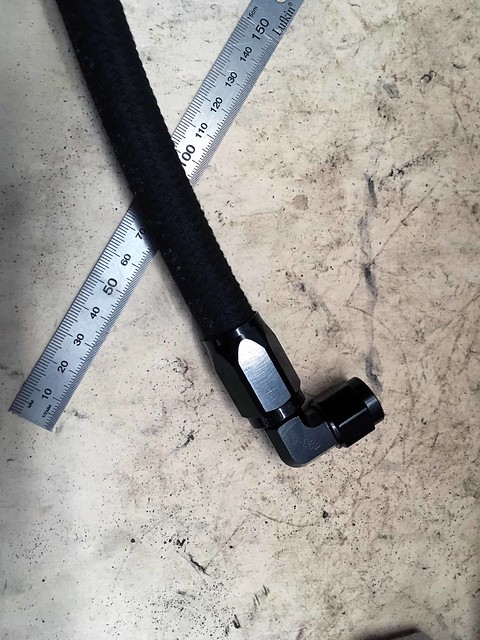
Locate and measure rear brake line requirements

Fri 08.11.2013 Day
Purchase new rear brake lines

Sat 09.11.2013 Day
Fit rear brake lines
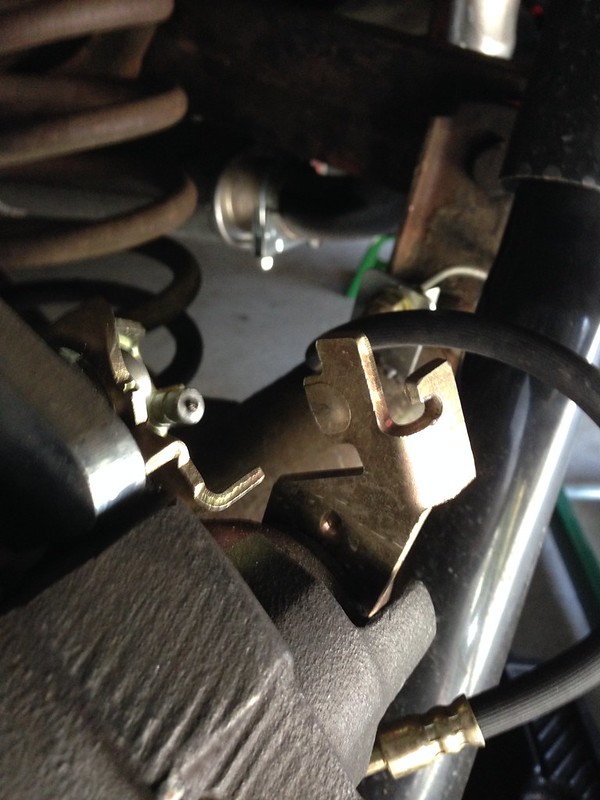
Fit new rear handbrake cables
Fit centre handbrake cable (retain existing front h/brake cable)
Fabricate new passenger side handbrake mounting hook (to suit short rear handbrake cables)
Remove driver side front drum
Dummy-up driver side front disc assembly

Thu 14.11.2013 Evening
Remove passenger side front drum
Relieve driver side mounting bracket to clear steering arm

Mon 18.11.2013 Evening
Bolt-up driver side front disc mounting brackets
Grease driver side front hub
Assemble driver side front hub and calliper/disc assembly
Relieve passenger side mounting bracket to clear steering arm
Bolt-up passenger side front disc mounting brackets
Grease passenger side front hub
Assemble passenger side front hub and calliper/disc assembly
Align and fit front brake hoses
Remove distribution block

Tue 19.11.2013 Evening
Remove existing master
Dummy-fit new master

Thu 21.11.2013 Evening
Remove existing booster
Enlarge holes in the firewall to fit new booster stud pattern

Sat 23.11.2013 Day
Dummy-fit new booster/master/combo valve
Make brake line templates

Monday 25.11.2013 Day
Purchase new front brake lines
Purchase 2 x blanking plugs

Monday 25.11.2013 Evening
Bench bleed master
Bolt in the booster/master/combo valve
Bolt in new brake lines
Fill diff with oil

Thursday 28.11.2013 Evening
Grind down the booster-master pushrod
Bleed brakes
Drive!

To-Do
Tack-weld rear axle housing tabs
P-clips for rear hand brake cables
Adjust handbrake actuators?

Thursday, 28 November 2013

OK... *now* we're finished!

DiscBrakes05

Shortened the booster-master push rod (thanks Rob S for the loan of the bench grinder... gotta' get me one of those!) by the thickness of the temporary spacers we had in.

Bleed brakes.

Bolt on the rear calipers (the calipers need to be cocked for bleeding to ensure the bleed nipples are horizontal and no air can get trapped in the caliper) and the brakes a final once over.

Wheels on and drop it back on the deck.

Connect vacuum hose to booster.

Top-up fluids and connect battery.

Start it up... time for the test drive!

Wow...!

Disc brakes have transformed the way the car drives and how you approach driving it. So much more confidence. You can stand on the brakes and it pulls up straight, with no early lock-up from the rears (which the drums were prone to do).

The kit went together like a dream and a HUGE thanks to JtC! Thanks for weaving your magic; easily the best mod we have made to the Chev yet.

Rego is coming up, so I will get Chris to tack the rear hose mounting tabs to the axle housing when it goes for pink slip.

Now to bed in the brakes and get some kms under the tyres.

J

Monday, 18 November 2013

Discs on and back on the deck

Firstly, the booster that came with the kit was damaged in transit. Summit kindly sent out a replacement and this was waiting for me on my desk this morning...

IMG_0389


The evening brought JtC North; time to finish the installation of the rotors.

Passenger side brackets torqued up...

IMG_0391


Some detail shots of the bracket arrangement...

IMG_0392

IMG_0393

IMG_0398


Bearings were packed with grease and installed in the hubs. Calipers were bolted up and time was spent routing the front brake hoses so they didn't rub on the chassis rails.

Before long, the wheels were back on and the Chev was back on the ground again...

IMG_0399


The end is in sight with the booster/master left to do, along with the front brake lines.

J

Thursday, 14 November 2013

Some adjustments

With the lower bracket ever so slightly fouling on the steering arm, it was time to get modifying with a hand file.

Once relieved, the bracket was given a hit of satin black.

Front Disc Brackets

Front Disc Brackets


The forward mounting bolt also needed to be shortened ~ 0.5" as it fouled the lower control arm before the bump stop at full lock...

Front Disc Brackets


Done!

Front Disc Brackets


J

Saturday, 9 November 2013

Finishing the rears and onto the front

New rear brake lines made-up. Photo showing new vs. old...

New Rear Brake Lines


Let's get them in!

DSC_0006 006

DSC_0004 004

DSC_0002 002

DSC_0005 005

Sweet as a nut!

Handbrake was then hooked up. The supplied centre cable was the wrong part (too short), so we reused the existing one. Both rear handbrake cables finish slightly further toward the rear of the car than the originals, so we had to make-up a passenger side handbrake mounting hook extension to get it all to fit.

To the front of the car now. The drums came off easily enough and it was time to dummy-up the kit's brackets...

Trial Fitting the Caliper Mounts

DSC_0008 008


The bottom bracket picks up the steering arm connection bolts and the brackets as-supplied both need a bit of relieving to clear the steering arm. That will be a job for next time.

J

Thursday, 7 November 2013

Rear Discs (cont.)

Bits and pieces acquired and old studs belted out of the flanges; time to fit it together...

Rear 005

Rear 003

Rear 001


Greasing the axle housing seals...

Rear 004


A couple of reference shots, showing the route of the existing hard lines...

Rear 007

Rear 006


Finally, mocking-up the route of the flexible hose and the brake line/brake hose mounting tab...

Rear Brake Line Detail


You can see from the photo above that each hard line needed to be shortened, so time for some new lines to be made-up.

J

Tuesday, 5 November 2013

Rear Discs

Tue night sees JtC make the trip to Chev Central.

Relatively short work is made of removing the rear axles, except we found the small retaining pin was snapped-off and when unscrewed, only ~ 20% came out, the rest was left in the hole! Thankfully, JtC was able to coax the remainder out with a scribe... definitely dodged a bullet there!

Cleaning up the axle flanges...

RearDiscs 002


Sweet new part goodness! The quality of construction and finish of the parts from Right Stuff is good...

RearDiscs 003


Then dummying it up...

RearDiscs 007


The caliper needs to be trial fitted to check what spacer is required to centre the caliper on the disc. Mine took the thinnest of the three spacers (the 0.25" spacer)...

RearDiscs 008


Lookin' good so far...

RearDiscs 005


The rotor hat is thicker than the drum backing plate, so I will need to replace some of the shorter wheel studs for longer ones; the decision was made to replace the lot.

A bit of a shopping list then:
- 2 x new rear axle housing seals
- a new diff cover gasket
- a replacement diff centre retaining pin
- 10 x wheel studs
- 10 x wheel nuts

John out

Monday, 4 November 2013

So it begins...

To give space for the rear axles to come out, the Chev will live in the centre of the double garage, relegating the Honda to the driveway and the elements.

RearDiscs 002


Drain the diff and remove the cover...

RearDiscs 008


The large pin that 2 x spider gears run on is located and restrained by a small pin. It is this small pin that must first be unscrewed, then the large pin pushes out to allow the axles to be pushed toward the centre of the car and the retaining C-clips removed to allow removal of the rear axles.

Simple!

J

Monday, 23 September 2013

After some research...

From: John
Sent: Monday, 23 September 2013 3:16 PM
To: JtC
Subject: After some research...
 
Firstly, I’ve got a 12 bolt diff; housing flange bolt pattern is…
 
 
…and my booster is 9” dia.
 
Pontiworld (local supplier)
Front Kit
Rear Kit
Comes to a total of ~ $2,330 delivered (remember his prices don’t include GST)!
 
Summit Racing
Comes to a total of ~ $1,780 delivered (if I have to pay GST).
 
$550 difference pays for a lot of cock-ups if they happen…
 
J

Sunday, 22 September 2013

Talk me out of buying this...

-----Original Message-----
From: John
Sent: Sunday, 22 September 2013 12:16 PM
To: JtC
Subject: Talk me out of buying this...

So... with the rear brake shoes beyond cactus and at least one rear drum
badly scored, my calcs says the damage is $400+ from Pontiworld.

Talk me out of buying something like this...
https://www.performanceonline.com/1955-68-Chevy-Fullsize-Impala-Belair-B
iscayne-Front-and-Rear-Power-Disc-Brake-Conversion-Kit/


J